Preparing to paint your kitchen cabinets requires careful planning and execution. This often-overlooked step is important to achieve a professional and long-lasting finish. Proper preparation ensures that the paint adheres well and stands up to the rigors of daily kitchen use. Neglecting this stage can lead to peeling, chipping, and a less-than-perfect appearance, undermining the time and effort invested.
This article will guide you through the essential steps to prepare your kitchen cabinets for painting. We’ll highlight why each step is vital for a successful and durable result.
Initial Considerations
Before diving into the painting process, it’s essential to address some preliminary steps to ensure your project is a success. These initial considerations will help you assess the condition of your cabinets and choose the optimal time and setting for your work.
Assessing the Condition of the Cabinets
1. Checking for Damage and Necessary Repairs
Start by thoroughly examining your kitchen cabinets for any signs of damage. Look for cracks, dents, loose hinges, or any structural issues that need attention. Addressing these problems before painting is crucial because paint cannot hide imperfections. Fill in cracks and dents with wood filler, tighten or replace hardware, and ensure the cabinets are in good repair. This step guarantees a smooth and even surface, allowing the paint to adhere properly and look its best.
2. Evaluating the Material of the Cabinets
The material of your cabinets significantly influences the painting process. Different materials require different preparation techniques and types of paint. For instance, wooden cabinets might need sanding and priming, while laminate surfaces might require a special primer to ensure adhesion. Identify the material of your cabinets to choose the appropriate paint and preparation methods. Consulting with a paint specialist can provide valuable insights into the best products for your specific cabinets.
Choosing the Right Time and Setting
1. Planning Around Kitchen Usage and Availability
Timing your painting project is another critical consideration. Painting kitchen cabinets can disrupt your daily routine, so plan the project when the kitchen is least in use. This might mean scheduling the work during a vacation or over a long weekend. Additionally, consider the drying times for paint and primer and ensure you have enough time to complete each step without rushing.
2. Ensuring Proper Ventilation and Lighting
A well-ventilated and well-lit workspace is essential for painting cabinets. Proper ventilation helps disperse fumes from paint and primer, ensuring a safer working environment. Open windows and use fans to maintain good airflow. Adequate lighting is equally important; it allows you to see details clearly and avoid missing spots or applying uneven coats. Set up your workspace with sufficient lighting to ensure you can work comfortably and accurately.
Gathering Materials and Tools
Equipping yourself with the right materials and tools is essential for a smooth and efficient cabinet painting project.
Necessary Supplies
- Paints and Primers Suited for Cabinet Material
Choose high-quality paint specifically designed for cabinets, as it offers better durability and finish. Oil-based or latex paint can work well for wooden cabinets, while laminate cabinets might need a special bonding primer. Ensure you have enough primer to cover all surfaces, as this step is vital for proper paint adhesion and a smooth finish.
- Sanding Equipment and Safety Gear
Gather sanding equipment such as sandpaper in various grits, a sanding block, or an electric sander for larger areas. Sanding helps create a smooth surface and removes any existing finish that could interfere with the new paint. Additionally, prioritize safety by using protective gear, including gloves, safety glasses, and a dust mask, to protect yourself from dust and fumes.
How the Right Brushes, Rollers, and Sprayers Affect the Outcome
The tools you use to apply paint can significantly impact the final result. Quality brushes, rollers, and sprayers ensure even coverage and a smooth finish. Brushes with synthetic bristles are ideal for latex paints, while natural bristle brushes work well with oil-based paints. Foam rollers are excellent for flat surfaces, providing a smooth application without brush marks.
If you choose to use a sprayer, it can offer a flawless, professional finish, especially on larger areas. Investing in the right tools ensures that the paint goes on smoothly and evenly, avoiding streaks and uneven textures.
Long-term Benefits of Investing in Quality Materials
Investing in high-quality materials and tools may have a higher upfront cost, but it pays off in the long run. Quality paints and primers provide better coverage, durability, and resistance to chipping and peeling. They also tend to have better color retention and finish, maintaining the fresh look of your cabinets for years.
Similarly, durable brushes, rollers, and sprayers can be reused for multiple projects, offering consistent performance and saving you money over time. By choosing quality, you enhance the overall success of your project and ensure your cabinets look their best for years to come.
Preparation Steps
Proper preparation is the cornerstone of a successful kitchen cabinet painting project. Taking the time to meticulously prepare your cabinets will ensure a smooth, durable, and professional finish. Here are the essential preparation steps to follow before you start painting.
- Removing Cabinet Doors and Hardware: The first step in preparing your cabinets is to remove the doors, drawers, and all hardware. This includes hinges, handles, and knobs. Label each door and its corresponding hardware to make reassembly easier. Removing these components allows you to paint each surface thoroughly and avoid paint drips or missed spots.
- Cleaning the Surfaces: Kitchens are prone to grease, grime, and residue buildup, which can prevent paint from adhering properly. Clean all cabinet surfaces with a degreaser or a mixture of warm water and mild detergent. Scrub thoroughly to remove any dirt, oil, or food particles. Once cleaned, rinse the surfaces with clean water and let them dry completely.
- Sanding the Cabinets: Sanding is a critical step to ensure the paint adheres well to the cabinet surfaces. Use medium-grit sandpaper (around 120 to 150 grit) to sand all surfaces lightly. This step removes any existing finish and roughens the surface, providing a better grip for the primer. After sanding, wipe down the cabinets with a tack cloth to remove any dust.
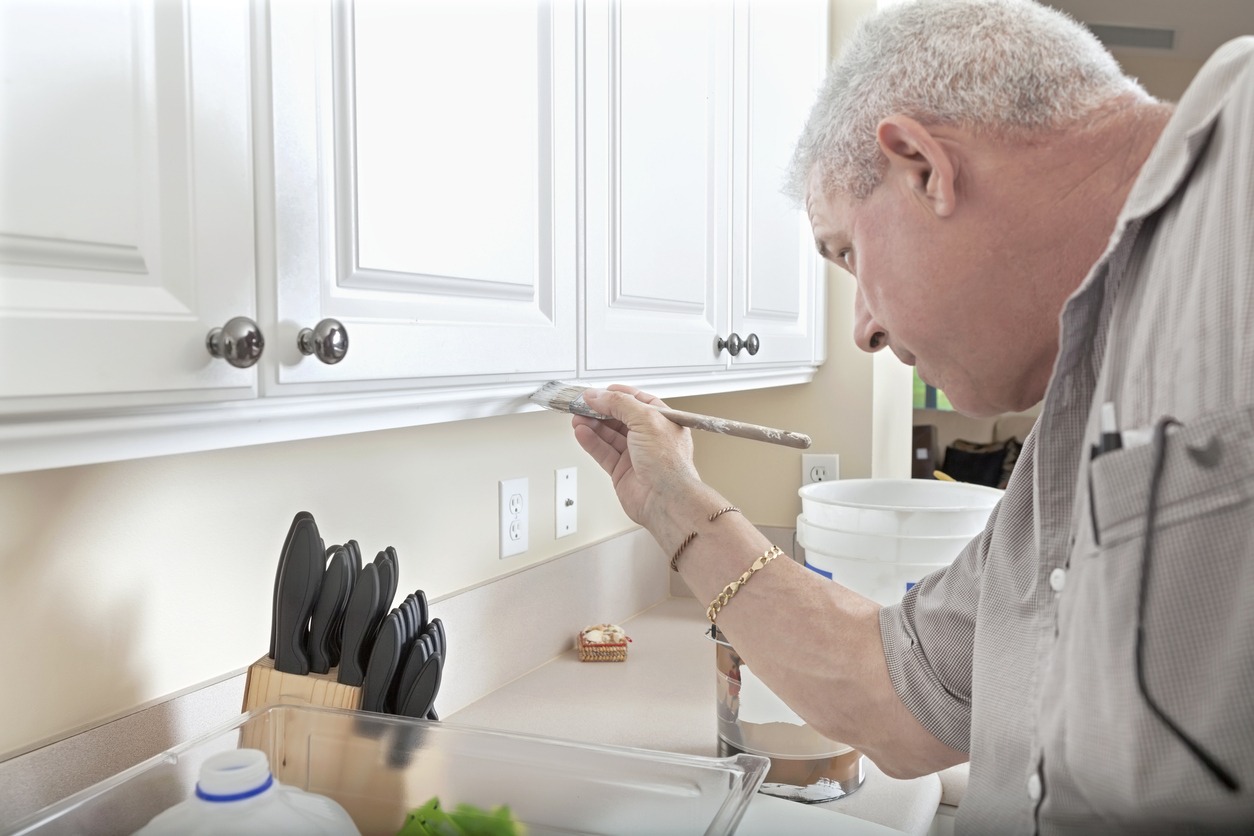
- Applying Primer: Priming the cabinets is essential to create a smooth, even surface for the paint. Choose a primer suitable for your cabinet material. Apply a thin, even coat of primer to all surfaces using a brush, roller, or sprayer. Allow the primer to dry completely according to the manufacturer’s instructions. Priming not only helps the paint adhere better but also enhances the paint’s color and finish.
- Filling Holes and Imperfections: After priming, inspect the cabinets for any holes, cracks, or imperfections that need filling. Use wood filler or putty to fill in any gaps or dents. Smooth the filler with a putty knife and let it dry. Once dried, sand the filled areas lightly to ensure a seamless surface. Wipe away any dust with a tack cloth before moving on to painting.
- Taping and Protecting Surrounding Areas: To protect your kitchen and ensure clean lines, use painter’s tape to cover areas you don’t want to paint, such as walls, countertops, and floors. Lay down drop cloths or plastic sheeting to catch any drips or spills. Proper masking and protection help maintain a clean workspace and make the final cleanup easier.
Safety Measures
Safety is paramount when undertaking a kitchen cabinet painting project. Ensuring you follow proper safety measures will protect you from potential hazards and create a safer working environment. Here are some essential safety tips to keep in mind:
- Ventilation: Ensure proper ventilation by opening windows and using fans to circulate air. Work in well-ventilated areas to reduce exposure to fumes from paints, primers, and cleaners.
- Protective Gear: Wear safety goggles to protect your eyes from dust, paint splatters, and fumes. Use a dust mask or respirator to avoid inhaling dust and harmful chemicals. Wear gloves to protect your hands from chemicals and rough surfaces.
- Proper Lighting: Ensure your workspace is well-lit to avoid accidents and ensure you can see what you’re doing clearly.
- Safe Handling of Tools and Equipment: Follow the manufacturer’s instructions when using power tools, such as sanders and sprayers. Keep tools and equipment in good condition and check for any damage before use.
- Chemical Safety: Read and follow the safety instructions on paint, primer, and cleaner labels. Store chemicals in their original containers and keep them out of reach of children and pets. Dispose of paint and chemical waste according to local regulations to prevent environmental harm.
- Fire Safety: Keep flammable materials, such as rags soaked in paint or solvents, away from heat sources. Keep a fire extinguisher nearby and know how to use it in an emergency.
- Ladder Safety: Use a stable, non-slip ladder when reaching high cabinets. Ensure the ladder is on a flat surface, and do not overreach while on the ladder.
- Clean Workspace: Keep your workspace organized and free of clutter to prevent trips and falls. Clean up spills immediately to avoid slipping hazards.
- Breaks and Hydration: Take regular breaks to rest and stay hydrated, especially when working for extended periods.
By implementing these safety measures, you can create a secure environment and minimize risks during your kitchen cabinet painting project. Prioritizing safety protects you and ensures a smoother and more enjoyable painting experience.
Conclusion
Proper preparation and safety are key to achieving beautiful, long-lasting results when painting your kitchen cabinets. By following the steps outlined in this article, you’ll ensure a professional finish that enhances the look of your kitchen.
If you need assistance or prefer to leave it to the experts, contact Custom Painting, Inc. at 925-294-8062 or fill out our contact form. Our experienced team is ready to help you transform your kitchen with expert painting services.