
When it comes to updating the look of wooden furniture or decor, many people wonder if they can stain over wood that has been previously painted. Staining can add rich color and enhance the natural beauty of wood, but can it be done on surfaces that are already painted? This article explores whether it’s possible to stain painted wood, the steps involved, and tips for achieving the best results. Whether you’re a DIY enthusiast or just looking to refresh your home, read on to learn how you can transform your painted wood pieces with stain.
Understanding the Basics
When considering whether to stain painted wood, it’s important to understand some foundational concepts. This section will clarify what painted wood is, how it differs from stained wood, and why someone might want to stain over a painted surface.
What is Painted Wood?
Painted wood is simply wood that has been coated with paint. Paint is a pigmented liquid that, when applied to a surface, dries to form a protective and decorative film. This film can come in various colors and finishes, such as matte, gloss, or satin. Paint is often used to cover the wood grain entirely, providing a uniform look and added protection against elements like moisture and UV rays.
Differences Between Painted and Stained Wood
The primary difference between painted and stained wood lies in their appearance and the way they interact with the wood surface. Painted wood is covered with a layer of paint that conceals the natural grain and texture of the wood. On the other hand, stained wood involves applying a stain, which is a semi-transparent solution that penetrates the wood fibers, enhancing its natural grain and adding color without completely covering the texture.
Stains are usually used to highlight the beauty of the wood, showcasing its unique patterns and features. While paint forms a barrier on the surface, stain soaks into the wood, often requiring a topcoat of varnish or polyurethane to protect the wood and maintain the stain’s appearance.
Common Reasons for Wanting to Stain Painted Wood
There are several reasons why someone might want to stain over painted wood. Some of the most common motivations include:
- Aesthetic Change: Homeowners or decorators might want to change the look of a piece of furniture or a surface from a solid, painted color to a more natural, stained appearance that highlights the wood’s grain.
- Restoration: If the paint on a wood piece is chipping, peeling, or worn out, staining might be considered a way to restore and refresh the wood’s appearance.
- Personal Preference: Some people simply prefer the look of stained wood over painted wood. Staining can give wood a more rustic or sophisticated look, depending on the chosen stain color and finish.
Understanding these basics sets the stage for exploring whether and how you can stain over painted wood, ensuring that the process and results meet your expectations.
Preparing the Surface
Before you can successfully stain painted wood, proper preparation of the surface is crucial. This section outlines the necessary tools and materials, steps for removing paint, and the importance of safety precautions.
Necessary Tools and Materials
To prepare the painted wood surface for staining, you’ll need the following tools and materials:
- Paint stripper
- Scrapers (plastic or metal)
- Sandpaper (various grits, typically ranging from 80 to 220)
- Orbital sander or sanding block
- Paintbrushes or rags
- Drop cloths or plastic sheeting
- Safety goggles
- Gloves
- Respirator mask
- Mineral spirits or denatured alcohol (for cleaning)
- Wood filler (if needed)
Steps for Removing Paint from Wood
- Set Up Your Workspace: Begin by preparing a well-ventilated area. Lay down drop cloths or plastic sheeting to protect your workspace from debris and chemical spills.
- Apply Paint Stripper: Wearing safety goggles, gloves, and a respirator mask, use a paintbrush to apply a generous layer of paint stripper to the painted surface. Follow the manufacturer’s instructions regarding application thickness and wait time.
- Scrape Off the Paint: After the paint stripper has set for the recommended time, use a scraper to remove the softened paint gently. Start with a plastic scraper to avoid damaging the wood, and switch to a metal scraper if necessary. Be sure to scrape in the direction of the wood grain.
- Clean the Surface: Once the majority of the paint is removed, use mineral spirits or denatured alcohol to clean the wood surface, removing any remaining stripper residue.
- Sand the Wood: Begin sanding with coarse-grit sandpaper (80-120) to remove any stubborn paint and smooth out the wood surface. Gradually move to finer grits (150-220) to achieve a smooth finish. Use an orbital sander for larger surfaces and a sanding block for detailed areas.
- Inspect and Repair: Check the wood for any imperfections or damage. Use wood filler to repair any dents, scratches, or holes. Let the filler dry completely before sanding it smooth.
- Final Clean-Up: Wipe down the wood with a clean, damp cloth to remove any sanding dust. Allow the wood to dry completely before proceeding to the staining process.
Importance of Safety Precautions
Safety is paramount when preparing painted wood for staining. Paint strippers and other chemicals can be hazardous, and sanding generates dust that can be harmful if inhaled. Here are key safety precautions to follow:
- Ventilation: Always work in a well-ventilated area to avoid inhaling fumes from paint strippers and dust from sanding.
- Protective Gear: Wear safety goggles, gloves, and a respirator mask to protect your eyes, skin, and lungs from chemicals and dust.
- Proper Disposal: Dispose of paint, stripper residue, and sanding dust according to local regulations to prevent environmental contamination.
- Avoid Fire Hazards: Keep flammable materials away from heat sources and open flames, and store chemicals properly when not in use.
By taking the necessary safety precautions and following the steps for paint removal, you can ensure that the wood surface is well-prepared for staining, leading to a more successful and attractive finish.
Staining the Wood
After preparing the surface, the next step is to stain the wood. This process involves selecting the appropriate stain, applying it correctly, and ensuring an even finish. Here’s how to go about it.
Choosing the Right Type of Stain
When choosing a stain, consider the following types:
- Oil-Based Stains: These penetrate deeply into the wood, providing rich color and long-lasting results. They are ideal for high-traffic areas but require longer drying times and proper ventilation.
- Water-Based Stains: Easier to clean up and quicker to dry, water-based stains are environmentally friendly and less odorous. They are suitable for indoor projects but may raise the wood grain.
- Gel Stains: These sit on the surface of the wood, providing an even color without penetrating deeply. They are ideal for vertical surfaces or woods with uneven grain.
Consider the project’s requirements and the type of wood to select the best stain for your needs.
Step-by-Step Guide to Applying the Stain
- Test the Stain: Before applying the stain to your entire piece, test it on a small, inconspicuous area of the wood to ensure you’re satisfied with the color.
- Prepare the Stain: Stir the stain thoroughly to ensure an even color. Avoid shaking the can, as this can create bubbles.
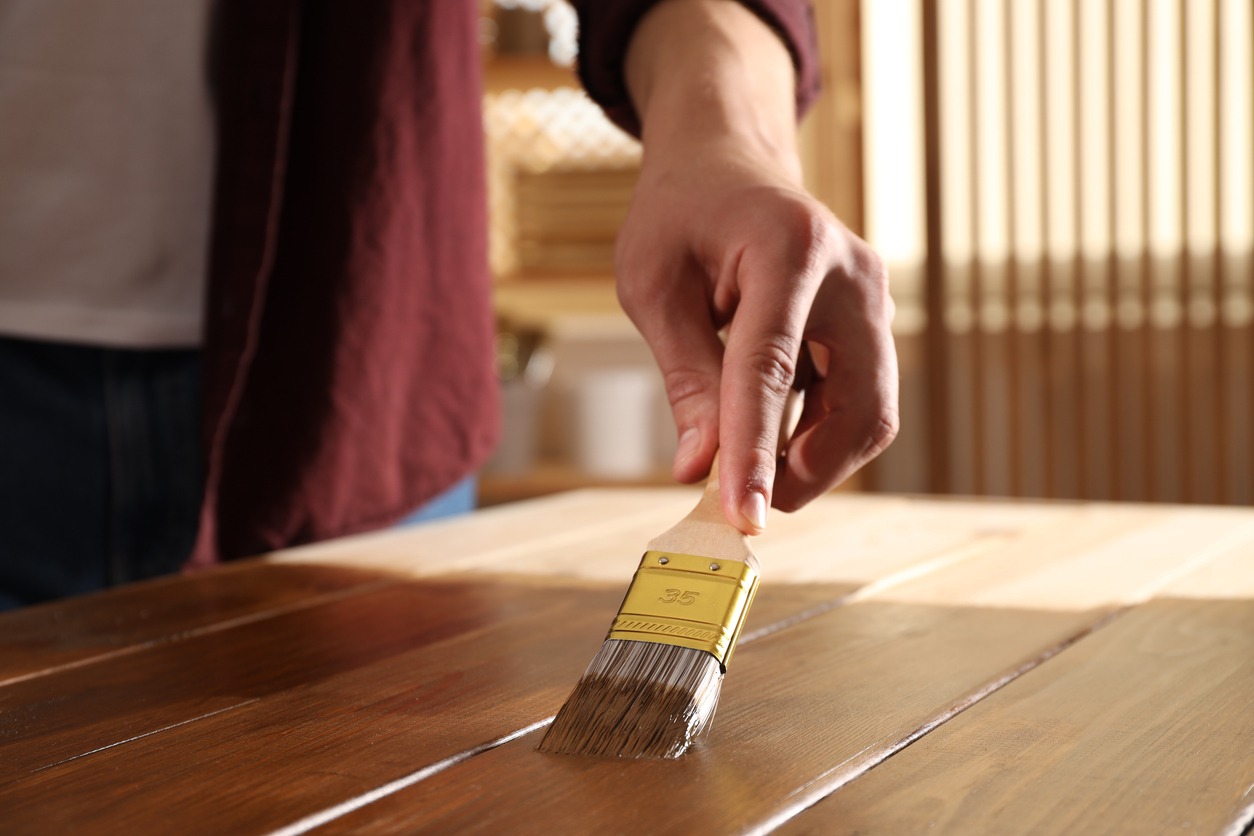
- Apply the Stain: Using a clean cloth, brush, or foam applicator, apply the stain in the direction of the wood grain. Work in manageable sections to avoid the stain drying before you have a chance to wipe off the excess.
- Wipe Away Excess Stain: After allowing the stain to sit for the recommended time (usually a few minutes), wipe off the excess with a clean cloth. Wipe in the direction of the grain to prevent streaks.
- Allow to Dry: Let the stain dry completely according to the manufacturer’s instructions. This may take several hours overnight.
- Apply Additional Coats: If a deeper color is desired, apply additional coats of stain, allowing each coat to dry thoroughly before applying the next.
- Seal the Wood: Once you’ve achieved the desired color and the stain is fully dry, apply a clear protective finish, such as polyurethane or varnish, to seal the wood and protect it from wear and tear.
Tips for Achieving an Even Finish
- Consistent Application: Apply the stain evenly and consistently, maintaining the same pressure and motion to avoid blotches.
- Control Excess Stain: Regularly wipe off excess stains to prevent uneven drying and color buildup.
- Smooth Surface: Ensure the wood is sanded smoothly and free of dust before staining. Any imperfections will show through the stain.
- Blend Edges: When staining large surfaces, blend the edges of each section to avoid visible lines or overlaps.
- Temperature and Humidity: Work in a controlled environment where temperature and humidity are stable, as extreme conditions can affect the stain’s drying time and consistency.
By carefully choosing your stain and following these steps and tips, you can achieve a beautiful, even finish that enhances the natural beauty of your wood project.
Sealing and Finishing
Once you’ve stained your wood, sealing and finishing are essential steps to protect and enhance the beauty of your work. This section covers the importance of sealing, the types of sealants and finishes available, and application techniques to ensure long-lasting results.
Importance of Sealing the Stained Wood
Sealing stained wood is crucial for several reasons:
- Protection: A sealant protects the wood from moisture, dirt, and wear, prolonging its life and maintaining its appearance.
- Enhanced Appearance: Sealants can enhance the color and depth of the stain, giving the wood a richer and more polished look.
- Durability: A proper sealant adds a layer of durability to the wood, making it more resistant to scratches, dents, and other forms of damage.
- Ease of Maintenance: Sealed wood is easier to clean and maintain, ensuring it stays looking good for years to come.
Types of Sealants and Finishes
Several types of sealants and finishes can be used on stained wood, each with its own advantages:
- Polyurethane: Available in oil-based and water-based formulas, polyurethane is one of the most durable finishes. It provides excellent protection against moisture and scratches and is available in various sheens, from matte to high gloss.
- Varnish: Varnish is a versatile finish that offers a high level of protection and can be used for both interior and exterior wood. It enhances the wood’s natural beauty and provides a hard, durable finish.
- Shellac: Shellac is a natural resin that provides a warm, amber finish. It dries quickly and is easy to apply, but it is less durable than polyurethane and varnish.
- Lacquer: Lacquer dries quickly and provides a durable, high-gloss finish. It is often used on fine furniture and cabinetry but requires good ventilation due to its strong fumes.
- Wax: Wax is easy to apply and gives a soft, natural finish. However, it offers less protection than other sealants and may need to be reapplied periodically.
Application Techniques for Long-Lasting Results
- Prepare the Surface: Before applying the sealant, ensure the stained wood is clean, dry, and free of dust. Lightly sand the surface with fine-grit sandpaper (220 grit) to ensure a smooth finish.
- Choose the Right Tools: Use a high-quality brush, foam applicator, or cloth appropriate for the type of sealant you are applying. Foam brushes are ideal for smooth, even coats, while natural-bristle brushes work well with oil-based finishes.
- Apply Thin Coats: Apply the sealant in thin, even coats, following the direction of the wood grain. Avoid applying thick layers, as this can lead to drips, bubbles, and an uneven finish.
- Allow Proper Drying Time: Follow the manufacturer’s instructions for drying times between coats. Rushing this process can result in a tacky finish that doesn’t fully harden.
- Sand Between Coats: Lightly sand the surface between coats with fine-grit sandpaper to remove any imperfections and ensure a smooth finish. Wipe away any dust with a clean, damp cloth before applying the next coat.
- Apply Multiple Coats: For the best protection and appearance, apply multiple coats of sealant. Typically, two to three coats are sufficient, but more may be needed for high-traffic areas or exterior wood.
- Final Curing: After applying the final coat, allow the sealant to cure completely before using the wood. This can take anywhere from a few days to a week, depending on the type of sealant and environmental conditions.
By understanding the importance of sealing, selecting the right sealant, and using proper application techniques, you can ensure your stained wood projects are not only beautiful but also durable and long-lasting.
Common Mistakes and How to Avoid Them

Staining wood can transform the appearance of your projects, but certain common mistakes can hinder your results. This section discusses these mistakes and provides tips on how to avoid them.
Skipping Surface Preparation
Mistake: Skipping or inadequately preparing the wood surface before staining can lead to uneven color absorption, visible imperfections, and a subpar finish.
How to Avoid:
- Thorough Cleaning: Ensure the wood is clean and free from dirt, grease, and old finishes. Use mineral spirits or a wood cleaner if necessary.
- Proper Sanding: Sand the wood thoroughly, starting with a coarser grit (80-120) and progressing to finer grits (150-220). This smooths the surface and opens the wood pores for better stain absorption.
- Remove Dust: After sanding, wipe the surface with a tack cloth or damp rag to remove all dust particles.
Incorrect Stain Application
Mistake: Incorrect application of stain, such as applying too much stain, not wiping off the excess, or working in uneven sections, can result in blotchy or streaky finishes.
How to Avoid:
- Apply Evenly: Apply the stain evenly with a brush, cloth, or foam applicator, following the direction of the wood grain.
- Work in Sections: Stain small, manageable sections to avoid the stain drying before you can wipe off the excess.
- Wipe Off Excess: After allowing the stain to penetrate for a few minutes, wipe off the excess with a clean cloth, moving in the direction of the grain.
- Multiple Thin Coats: If a deeper color is desired, apply multiple thin coats rather than one thick coat, allowing each coat to dry fully before applying the next.
Not Using a Sealant
Mistake: Failing to apply a sealant after staining leaves the wood vulnerable to damage from moisture, scratches, and wear, reducing the durability and longevity of the finish.
How to Avoid:
- Choose the Right Sealant: Select a sealant that suits your project’s needs, such as polyurethane, varnish, shellac, lacquer, or wax.
- Proper Application: Apply the sealant in thin, even coats, following the direction of the grain. Use a high-quality brush, foam applicator, or cloth.
- Allow Drying and Curing: Follow the manufacturer’s instructions for drying times between coats and allow the final coat to cure completely before using the wood.
- Multiple Coats: Apply multiple coats of sealant for enhanced protection and durability, sanding lightly between coats to ensure a smooth finish.
By avoiding these common mistakes and following best practices for surface preparation, stain application, and sealing, you can achieve a professional-looking finish that enhances the beauty and longevity of your stained wood projects.
Final Thoughts
Yes, painted wood can be stained, but it requires proper preparation, careful application, and a good sealant to achieve the best results. By following the steps outlined in this article, you can transform your painted wood pieces into beautiful, stained works of art.
If you need professional help with your staining project, contact Custom Painting, Inc. at 925-294-8062 or through our contact form. Our experts are ready to assist you with all your painting and staining needs.