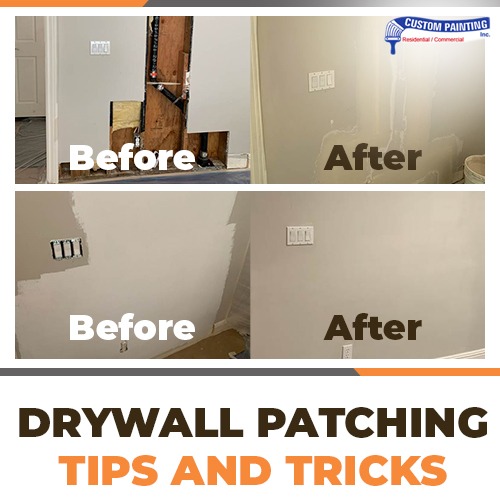
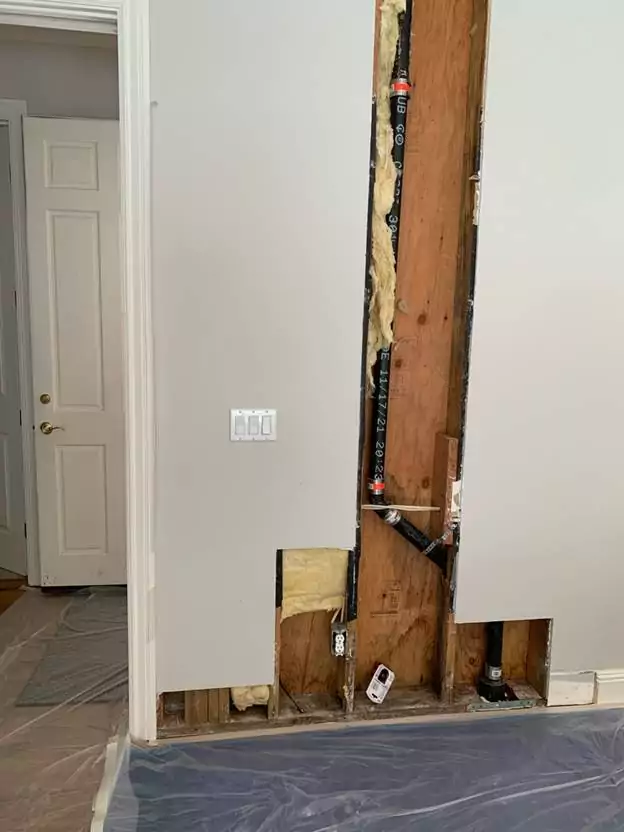
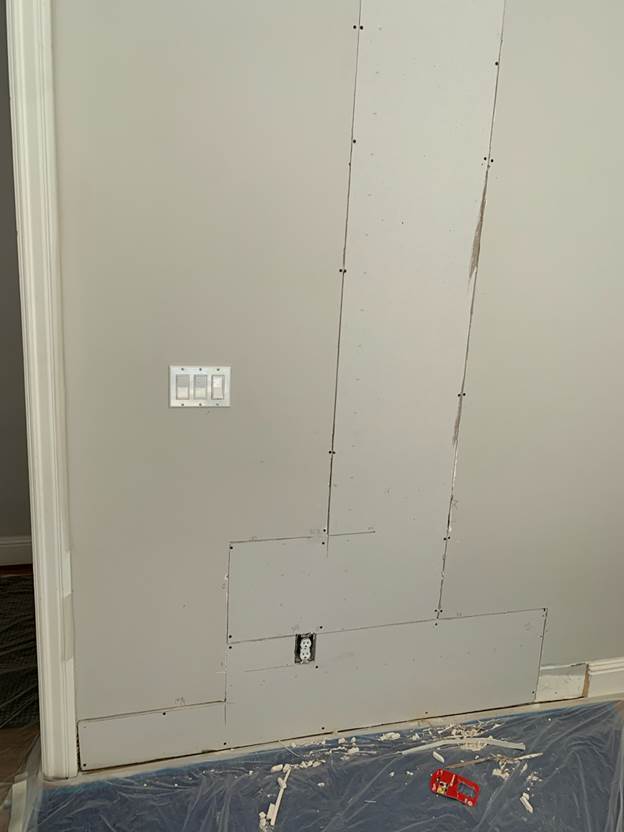
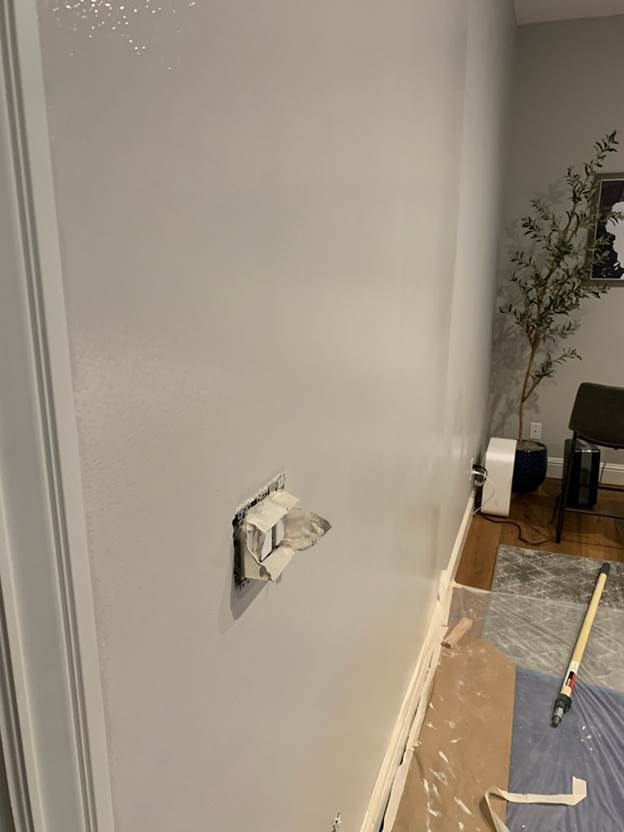
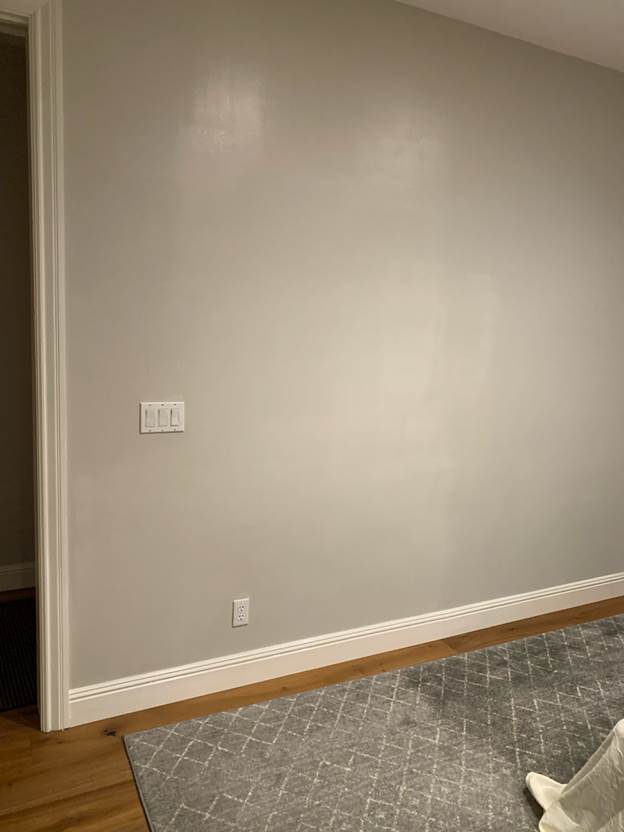
Whether house painters are called in to repaint the entire interior of a home or have been called in to repair damaged walls, there are many challenges to consider when working with interior drywall and preparing to do interior painting. Custom Painting, Inc. has painters skilled in drywall patching, replacing sheetrock, and painting walls. This house had missing sheetrock, so we fixed the opening and painted the room.
Issues and challenges of drywall patching
Bad patches These eyesores are some of the challenges at the top of the list for painters. For example, some patches consisted of nail holes filled with spackle but not feathered or sanded, or holes were filled with a tinted compound that was noticeably different from the existing wall color.
1. Drywall dust
Most drywall is made from gypsum (calcium sulfate dihydrate) with an outer paper layer, so sanding the drywall results in talcum-like dust. It’s something that painters and carpenters must deal with while painting or building a home.
The sanding compound is different, though. The results resemble the sawdust that you get from cutting wood. Heavier particles drop to the floor, rather than drifting in the air, but far less with drywall compound.
2. Damage to surrounding surfaces
Damage to surrounding surfaces can also be a challenge when patching drywall. The damage could include floor damage, furniture stains, light switches covered with paint, or drywall spots.
 3. Drywall holes of various sizes and shapes
The holes in the drywall to patch are sometimes different. There may be small, big, or holes with awkward shapes. Dents, scuffs, and holes from a doorknob, furniture, or other things banging on the wall may happen over time. Sometimes kids and pets can cause drywall damage, too.
It’s just one of those things. If you see holes in your drywall, make sure to get them patched and fixed as soon as possible to prevent further damage.
4. Drywall replacement
The following problems can go beyond repair if homeowners don’t address them promptly:
- Discoloration
- Bigger cracks and holes
- Mold and mildew
- Drywall rot
If your drywall is experiencing any of those issues, replacing it with new drywall is necessary.
Mold, mildew, and drywall rot are signs of water damage, often caused by plumbing leaks, clogged gutters, and downspouts. If leakage is the cause, identify the leaks and do simple plumbing repairs. In case of clogged gutters and downspouts, clean them and ensure they’re debris-free to allow the rainwater to flow freely through the system and divert away from the house.
Types of drywall
1. Regular drywall
Also called white board, regular drywall is the most common type used for walls and ceilings in homes and commercial buildings. The most common thickness for residential walls is ½ inch, and the most common drywall sheet size is 4 feet by 8 feet. However, it’s also available in lengths up to 16 feet for rooms with high ceilings.
2. Plasterboard
Also known as blue board, plasterboard is the base for many plaster applications, much like the lath in lath-and-plaster walls. It requires a thin coat (or coats) of plaster to be installed properly over the surface. The face paper is highly absorbent, allowing the plaster coat to adhere to the drywall better. Plasterboard is typically used in older homes to attain the appearance of lath and plaster walls.
3. Fire-resistant drywall
Fire-resistant drywall contains fiberglass, which slows down the fire and doesn’t burn as quickly as regular drywall (which contains gypsum). This type of drywall is usually installed in areas with equipment or chemicals that could cause a fire.
There are two varieties of fire-resistant drywall: Type X, which is 5/8”-inch thick and has up to one hour of protection from flames, and type C, which is the same as Type X, only it doesn’t shrink when burning. Type X can be used in multiple layers for protection when needed, while Type C is used primarily in ceilings to prevent them from collapsing during a fire.
4. Soundproof drywall
All types of drywall have soundproofing capabilities. However, soundproof drywall has additional materials such as gypsum, wood fiber, and polymers to increase the sound transmission class (STC), exceeding regular drywall. The STC is comparable to the Richter scale, which measures the amount of noise a material can stop. Soundproof drywall is installed where additional soundproofing is required, such as between shared walls and living spaces. Soundproof drywall is usually thick and dense, making it challenging to work with.
5. Mold-resistant drywall
Also called green board, mold-resistant drywall features a paper backing thicker than regular drywall and is coated with wax to repel moisture. This drywall also features a fiberglass mesh that is non-organic, removing the food source necessary for mold to grow. Mold-resistant drywall is used in bathrooms, washrooms, kitchens, laundry rooms, basements, and a tile backer. This drywall is also ideal if you live in a wet region or region with high humidity.
 Requirements for painting new drywall
 Requirements for painting new drywall
Here are the following requirements to ensure a flawless finish when painting new drywall.
- Adequate lighting – Make sure that good lighting is in place. Proper lighting makes everything more visible and noticeable.
- The right temperature — Make sure that the temperature is conducive to painting drywall – ideally, above 60 degrees Fahrenheit. A temperature change can cause movement from the surface and the seams, leading to new defects. Repair any surface flaws and seal your new drywall before painting.
Step-by-step instructions for patching and painting drywall
To avoid any of the issues mentioned above while restoring your home to its original appearance and beauty, follow the instructions below:
Tools:
- 200-grit sanding paper or sanding pole
- Dust mask
- Goggles
- Paintbrush
- Caulk gun
- Wall anchors
- Drill
- Hammer or mallet
- Screwdriver
Materials:
- Joint compound
- Caulk
- Primer
- Paint
Patching drywall – tips, and tricks
 Patching drywall – tips, and tricks
Whether during a complete interior painting or simply repairing a damaged wall, there are many challenges to consider while working on interior drywall.
Here are a few on top of the list:
- Poorly patched drywall – having an eyesore patch is at the top of our painters’ list.
- Dealing with dust all over your house.
- Damage to surrounding surfaces.
- Floor damage, furniture stains, light switches painted, or drywall spots on them.
Here are the tips to avoid the above issues while restoring your house to its original beauty.
1) Tips for covering and protecting all surfaces before any work is essential:
- Cover and protect the floor and furniture in the work area. If you can move the furniture out, but if you can’t, cover it to keep dust and paint off.
- Unscrew all your switch plates (if they are located on or near the drywall to be painted) and cover the outlets with painter’s tape.
- Seal the workspace to prevent construction dust from spreading to the surrounding areas.
- Start coverage from the ground up, adding layers of protection on the wood floor to prevent dust and tool damage.
- Add plastic sheeting for easy cleaning during the work process.
- Continue covering furniture and all non-working process.
- Add another layer of plastic sheeting to capture debris.
2) Tips to get rid of water damage
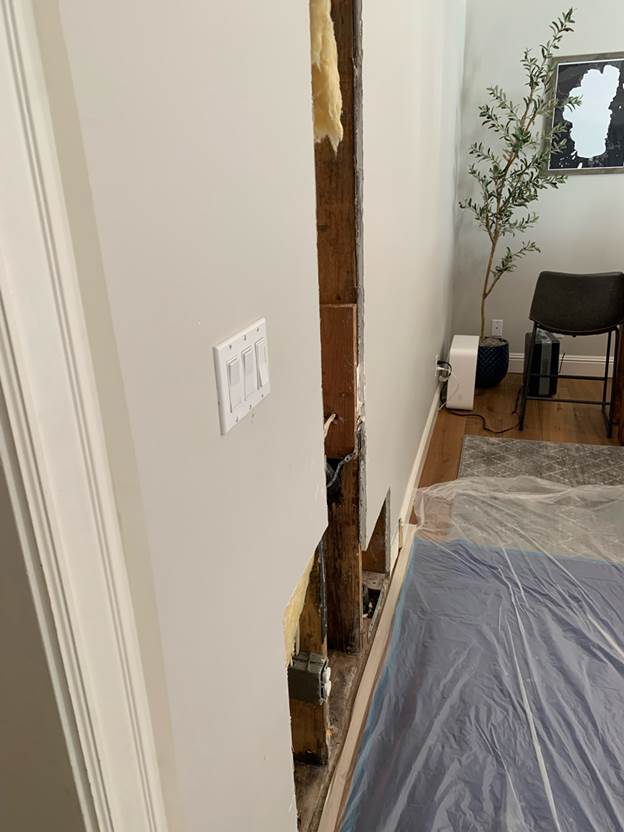
When you see water stains, a sagging surface, mold, or mildew spots, there are signs of water damage in your drywall. Since drywall is very porous, prolonged exposure to moisture can cause it to lose its structural integrity very quickly or experience other issues.
The surface issues could also indicate an underlying problem, such as rot in the studs or insulation.
When water damage is present in your drywall:
- Remove all wet or damaged drywall and insulation.
- Allow the interior structure to dry thoroughly before any repair can begin.
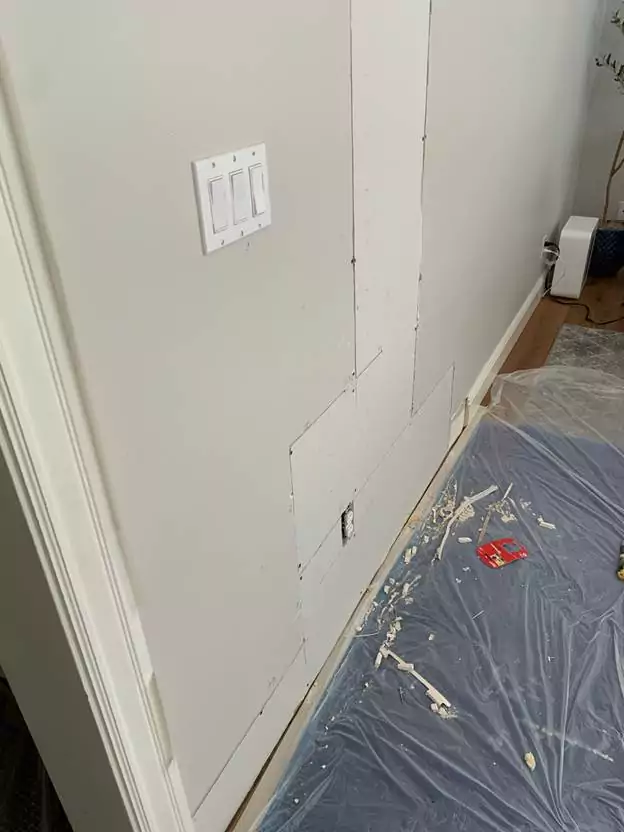
 3) Tips to secure loose drywall
Your drywall may have become loosened over time. This looseness is usually due to screws or wall anchors that may have moved the drywall, creating a larger hole that may no longer adequately hold the screw.
Here are the steps to screw loose drywall:
- Place the drywall over the studs.
- Drill a hole smaller than the anchor.
- Tap the anchor with a hammer or mallet.
- Finally, insert the anchor and use the screwdriver to secure the anchor into the drywall and the stud beneath it.
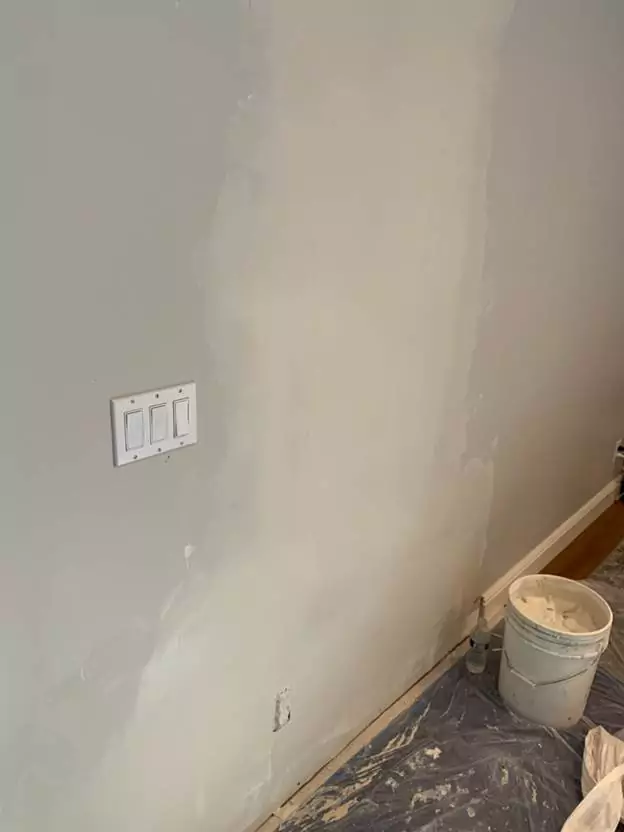
4) Tips to sand previous patches
After patching the drywall, it’s necessary to sand these repaired areas. These tips will ensure a smooth and seamless surface.
- Use a special sanding tool – You may need a hand sander, a package of 150-grit drywall sanding paper precisely cut to fit the hand sander, and a sanding sponge for sanding corners and smaller building details. You’ll also need a double-strap dust mask rated for nuisance dust. For larger sanding jobs, you may need a pole sander.
- For best results, choose fine sandpaper (120-grit or 150-grit). Purchase precut sheets to fit your hand sander.
- Make sure to wear goggles and a dust mask for protection.
5) Tips to prime glossy surfaces
 For glossy areas in your drywall, if any, it’s essential to prime them to ensure better patches and texture bonding.
- Ensure that the surface is clean and dry, clear of anything that could interfere with the adhesion of the topcoat or other materials to be applied.
- Any primer will do, but it’s best to choose the “super-grip” primer to apply over glossy surfaces without having to sand them first.
- You will only need one coat of the super-grip primer, as it will adhere to the glossy surfaces well.
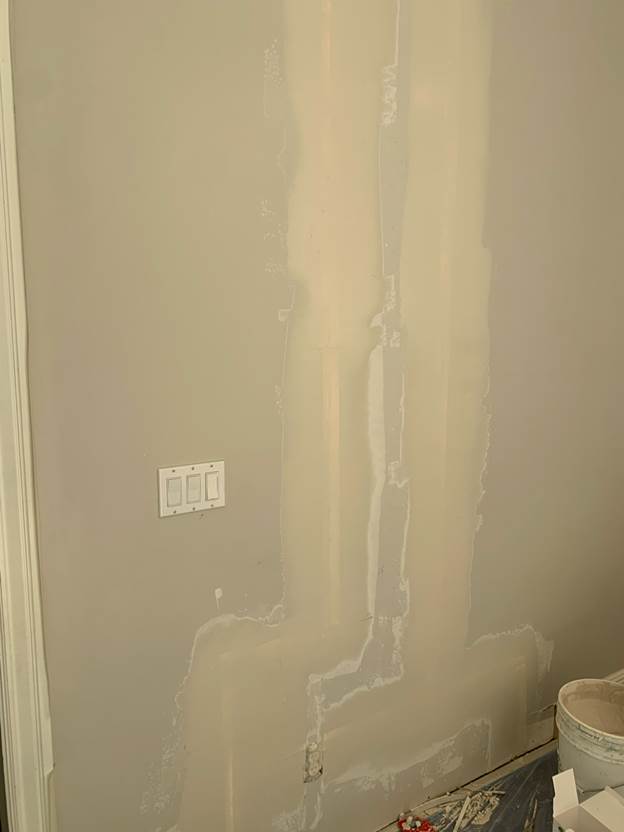
6) Tips to apply a thin layer or compound
“Skim coating” is a technique that uses a thin layer of joint compound to repair damaged drywall or smooth out textured walls back to their original surface.
It’s important to add just a thin enough layer of spackle or joint compound and let it dry between applications.
- Choose a paint roller instead of a sprayer. Although a texture sprayer may be the most efficient way to achieve the thin layer of the spackle or compound, a paint roller may be the most cost-effective option and just as efficient (primarily if you have used a roller before).
- Prepare your work area before doing the work. Lay down drop cloths on all nearby walking surfaces and tape off areas (such as trim) to protect them from drips or overspray.
- Use a mixing attachment for your power drill. The drill will save you time mixing your compound to achieve the thin, yogurt-like consistency.
- It’s also good to place an adequate light source at an angle to the surface where you will apply the compound or spackle.
- Use a trowel, taping knife, or any edged tool to help you smooth down the first coat of the compound.
 Adding thin layers, each one wider than the last, will help you to spread the patch area to existing surfaces for the best transition while minimizing dust.
Dust control
Most customer nightmare is dust throughout their home.
As you sand the drywall, it will help ensure you have a smooth finish and better adhesion of the coatings, and it’s vital to contain its dust. Here are the following ways to keep dust at a minimum:
- Be sure to wear your protective gear (dust mask and goggles).
- Add seal at entry points to contain dust.
- Remove electrical plate covers and protect switches and other items.
- Lightly sand the new texture to achieve a level, smooth finish.
 Apply a drywall primer
 Apply a drywall primer
Priming your new drywall before painting is crucial.
For patched drywall, a general latex primer is fine. It doesn’t chip, peel, or crack. It dries quickly on the surface and is easy to clean off. Latex primers usually have low VOCs, but some variants have no VOCs. They pair best with latex and acrylic paint.
PVA primer (emulsion primer) is also suitable for drywall, especially new and bare drywall.
Roll one latex or PVA primer coat to seal the surface and help the paint stick to the surface more uniformly. It would seal the new surface, exposing areas needing additional attention before applying the final paint coat. These primers also enhance the paint’s color and gloss.
Replace baseboards or trim. Caulk joints
Each baseboard type has its pros and cons.
While wood is more durable, it is also more expensive than the other baseboard options.
Medium-density fiberboard (MDF) is cheaper than wood and may be a good option, especially if you have many baseboards to install. However, MDF baseboards are prone to water damage, so there may be better ideas than using them in bathrooms, washrooms, and laundry rooms. They are also relatively soft and more prone to dents.
- Install any baseboard or trim area.
- Be aware you have to caulk joints and the top of baseboards, where they meet the wall with paintable caulk. It creates a nice finish that can significantly impact your space.
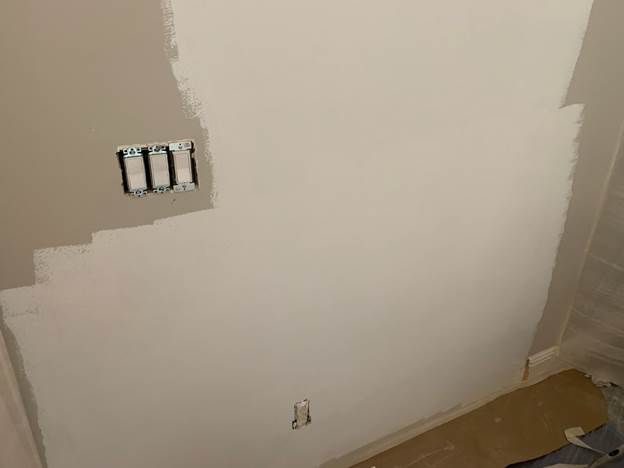
Paint over the patched area.
 Paint over the patched area.
To achieve a seamless paint finish, paint with thin coats of paint with wider coats to cover the areas beyond the patched area.
Clean up after the work is complete
- It is best to clean up immediately after painting.
- Keep a damp cloth nearby to wipe up any wet paint drips.
- Remove any painter’s tape before the paint has the chance to dry.
- When using latex paints, clean the brushes, rollers, and paint trays with running water.
- Fold the edges of drop cloths or plastic sheets toward the middle to prevent small spills or drips on surrounding surfaces.
- Allow the paint to dry completely before putting back furniture and wall decor.
Prep by Surface Type
Proper surface preparation is substrate-specific, ensuring the final coating adheres correctly and lasts for years. Each material presents unique challenges that must be addressed before the first drop of paint is applied.
-
Drywall: Preparation starts with patching all holes and cracks using joint compound. Once dry, surfaces are sanded smooth and thoroughly dusted. A high-quality primer is essential to seal the porous paper and compound, creating a uniform base for the topcoat.
-
Plaster: Common in older homes, plaster often requires filling fine cracks with a specialized patching compound. Because plaster can be more brittle and alkaline than drywall, it may need a masonry or oil-based primer to prevent “lime burn” or peeling.
-
Wood: For interior trim or paneling, wood must be sanded to remove old finishes and smooth the grain. After wiping away dust with a tack cloth, an oil-based or stain-blocking primer is used to seal in tannins and ensure a strong bond.
-
Brick: Interior brick is highly porous and can hold dust or efflorescence. Surfaces must be scrubbed clean and allowed to dry completely. A masonry-specific primer is then applied to fill the pores and provide a stable surface for the paint.
Conclusion
Drywall patching and painting can be challenging depending upon the type of damage, how severe the damage, and what room of the house the damage occurred. However, the information in this article can help you learn how to prepare and paint your drywall. Our information will help you correctly prepare your drywall before painting. Follow all the steps, tips, and tricks to painting your drywall like a professional.
Custom Painting, Inc. is a licensed and insured full-service painting company with over 40 years of experience providing painting and repair work to homes and businesses in the Bay Area. We have an innovative approach to everything we do, improving our way of servicing our customers in the best way possible.
Are you planning for your next interior or exterior house painting project? Don’t hesitate to contact our office at 510-795-0903 or fill out a request form to schedule an appointment for a free estimate.