Pressure-treated wood is a type of lumber chemically treated to resist rot, decay, and insect damage, making it ideal for outdoor projects like decks, fences, and playground equipment.
Understanding whether and how to paint pressure-treated wood is crucial because improper treatment can lead to peeling, flaking, and reduced longevity of the wood. Proper painting techniques ensure both aesthetic appeal and enhanced durability.
Understanding pressure-treated wood
What is pressure-treated wood?
Pressure-treated wood is lumber infused with chemical preservatives to protect it from rot, insects, and fungal decay. This treatment involves placing the wood in a pressure chamber where chemicals are forced deep into the wood fibers, ensuring long-term durability and resistance to environmental factors.
Benefits and common applications:
Benefits:
- Durability: Enhanced resistance to moisture, decay, and insect damage.
- Longevity: Increased lifespan compared to untreated wood, making it suitable for outdoor use.
- Cost-Effective: Lower maintenance costs due to its resistance to decay and pests.
Common applications:
- Decks: Provides a sturdy, long-lasting surface for outdoor living spaces.
- Fences: Ensures a robust barrier that withstands weather and insect damage.
- Outdoor structures: Ideal for pergolas, gazebos, playground equipment, and garden beds.
- Construction: Used in applications where wood is in contact with the ground or exposed to high humidity.
Differences between pressure-treated wood and untreated wood
Treatment:
- Pressure-treated wood: Infused with chemical preservatives to resist decay and pests.
- Untreated wood: Lacks chemical protection, making it more susceptible to environmental damage.
Durability:
- Pressure-treated wood: Significantly more durable in outdoor and moist environments.
- Untreated wood: Prone to rot, insect damage, and decay when exposed to the elements.
Maintenance:
- Pressure-treated wood: Requires less frequent maintenance and replacement.
- Untreated wood: Needs regular treatment with sealants and preservatives to prolong its life.
Pressure-treated wood offers enhanced durability and longevity, making it a preferred choice for outdoor applications where resistance to the elements is crucial. Understanding these differences helps select the best material for various construction and landscaping projects.
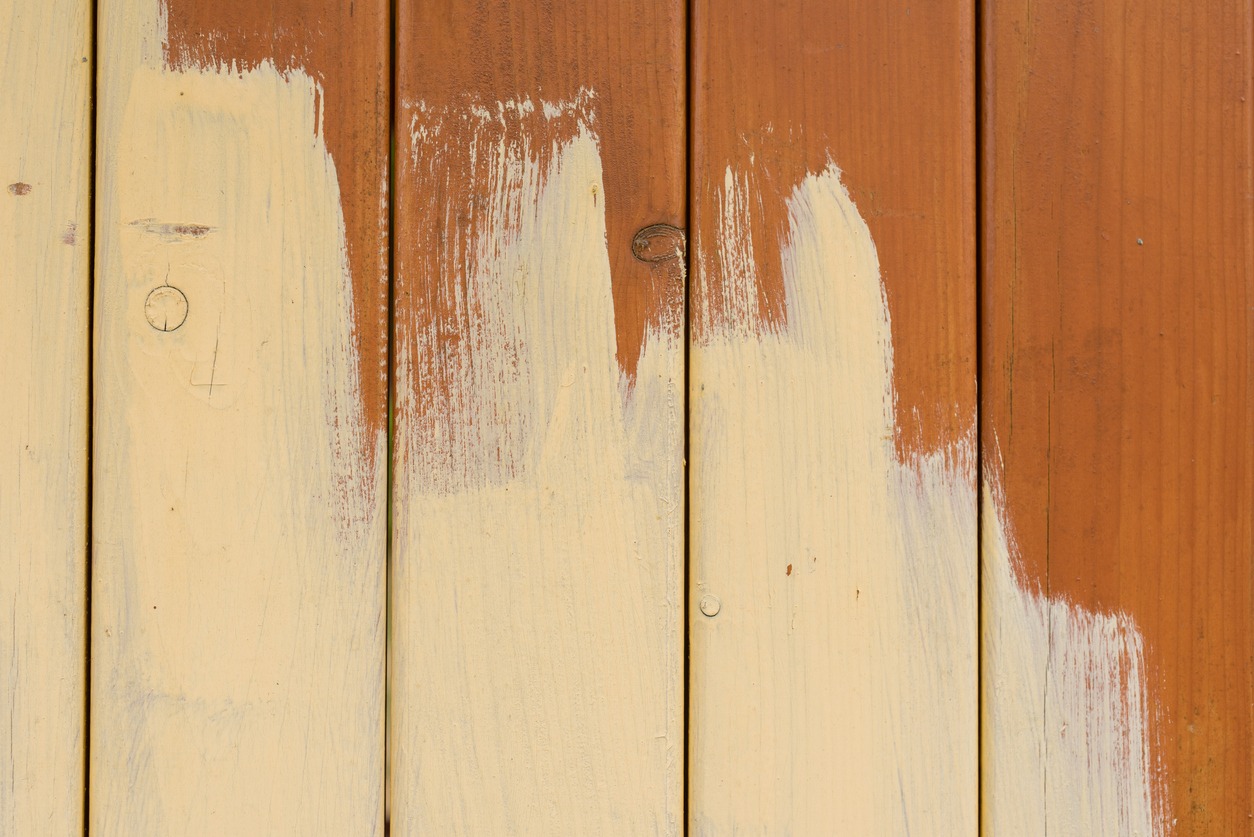
Challenges of painting pressure-treated wood
Painting pressure-treated wood can be problematic due to the following reasons:
- Moisture content: Pressure-treated wood often has high moisture content, making it difficult for paint to adhere properly. The wood must be thoroughly dried before painting, which can take weeks or even months.
- Chemical treatment: The chemicals used in the pressure-treating process, such as copper-based preservatives, can interfere with paint adhesion. These chemicals can leach out over time, causing the paint to peel or blister.
- Peeling and poor adhesion: Due to the moisture and chemicals, paint applied to pressure-treated wood often peels or flakes off. The wood’s surface needs to be correctly prepared, including cleaning and priming, to improve adhesion, but even then, the results can be inconsistent.
The combination of high moisture content and chemical preservatives in pressure-treated wood poses significant challenges to achieving a durable, long-lasting paint finish.
Preparing pressure-treated wood for painting
Necessary materials and tools
- Pressure-treated wood
- Soap and water or wood cleaner
- Scrub brush or sponge
- Sandpaper (120-150 grit)
- Tack cloth or damp rag
- Primer (specifically for pressure-treated wood)
- Paint (suitable for exterior use if outdoors)
- Paintbrushes or paint rollers
- Drop cloths or tarps
- Protective gear (gloves, goggles, mask)
Step-by-step reparation guide
1. Allowing the wood to dry and cure
- Duration: Typically several months.
- Reason: When purchased, pressure-treated wood is often saturated with preservatives and moisture. Allowing it to dry ensures the paint adheres properly and prevents issues like peeling or bubbling.
2. Cleaning the surface
- Materials needed: Soap and water or a wood cleaner, scrub brush, or sponge.
- Process:
-
- Mix soap and water or use a wood cleaner.
- Scrub the wood surface thoroughly to remove dirt, grime, and contaminants.
- Rinse the wood thoroughly with clean water and let it dry completely.
3. Sanding the wood
- Materials needed: Sandpaper (120-150 grit), tack cloth, or damp rag.
- Process:
-
- Sand the wood surface to create a smooth, even surface. This helps the primer and paint adhere better.
- Focus on removing any splinters or rough spots.
- After sanding, use a tack cloth or damp rag to remove all the dust.
4. Applying a primer
- Materials needed: Primer (designed for pressure-treated wood), paintbrushes or, rollers.
- Process:
-
- Choose a primer specifically formulated for pressure-treated wood.
- Apply the primer evenly across the wood surface using a brush or roller.
- Follow the manufacturer’s instructions for drying times.
- Ensure the primer is dry completely before painting.
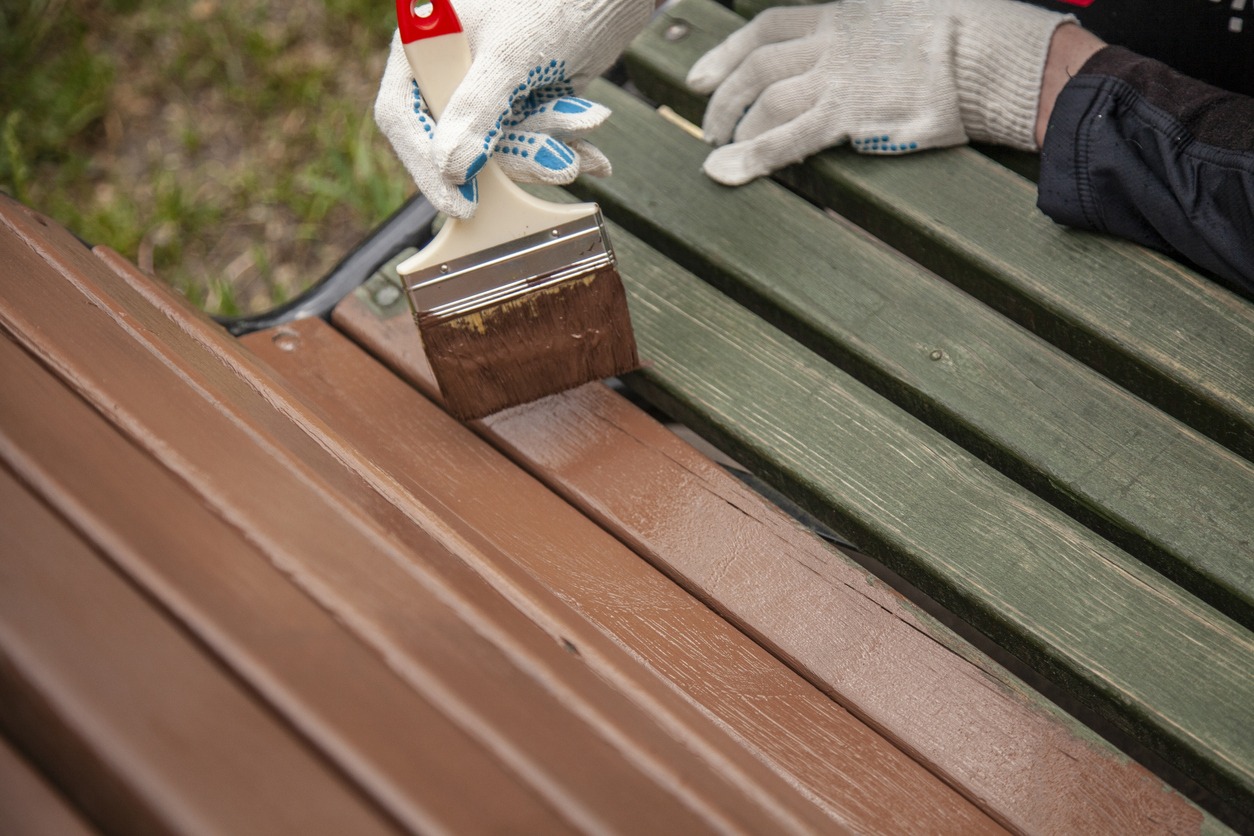
5. Painting
- Materials needed: Paint (suitable for exterior use if outdoors), paintbrushes, or rollers.
- Process:
-
- Once the primer dries, apply paint. Do it so in thin and even coats.
- Let each coat dry completely before applying the next coat.
- You may need two or more coats, depending on the desired finish and paint type.
Follow these steps to ensure that your pressure-treated wood is correctly prepared for painting, resulting in a durable and long-lasting finish.
Best practices for painting pressure-treated wood
Here are the best practices for painting pressure-treated wood:
- Choosing the right type of paint: Use high-quality latex paint, as it adheres better to pressure-treated wood and is more flexible than oil-based paint.
- Applying the first coat of paint evenly: Ensure the first coat is applied smoothly and evenly to create a solid foundation.
- Allowing proper drying time between coats: Let each coat dry thoroughly before applying the next, typically 24 hours, to ensure solid adhesion and finish.
- Applying additional coats for durability: To enhance the durability and longevity of the finish, apply at least two coats of paint.
- Sealing the painted surface: Use a clear sealer to protect the painted surface from moisture and environmental damage, extending the paint job’s life.
Conclusion
When painting pressure-treated wood, consider its usual challenges, including its high moisture content and chemical treatment, which can cause paint adhesion problems and peeling. The correct preparation, the most suitable paints, and proper application are the best practices to ensure a smooth, solid, and long-lasting paint finish on pressure-treated wood surfaces.
Painting this material is suitable if you want a more polished and colorful appearance, provided the wood is completely dry and prepped. However, using stains or sealants might be better if you prefer maintaining the natural wood look while protecting it from the elements. These options also penetrate deeper, offering more protection against weathering and decay.
For expert advice and high-quality painting services, contact Custom Painting, Inc. today to enhance and protect your outdoor wood surfaces! For questions, tips, or estimate requests, call us at 925-294-8062 or message us on our contact page.