The effectiveness of TSP as a cleaner and glossy paint stripper
Trisodium phosphate (TSP) has long been recognized for its effectiveness as a cleaner and degreaser in various applications. It is particularly useful for heavy-duty cleaning tasks where stubborn stains and buildup must be tackled. It can effectively remove layers of grease, smoke residue, and other tough-to-clean substances.
TSP can be used on various surfaces, including wood, metal, concrete, and masonry. Its versatility makes it a popular choice for cleaning projects indoors and outdoors. It is also highly effective at cutting through grease and grime. TSP is commonly used in cleaning products to dissolve and remove oily residues from surfaces such as walls, floors, and kitchen appliances.
TSP can be effective for stripping glossy paint from surfaces. However, due to its strong alkalinity, TSP can irritate the skin and eyes. Safety precautions and proper application instructions are essential when using TSP for paint removal. You also want to wear protective gear like gloves and goggles. Additionally, it’s important to ensure adequate ventilation when working with TSP, as it can produce fumes.
Before applying TSP, it should be tested on a small, inconspicuous area to ensure it doesn’t cause any damage or adverse reactions to the surface. Depending on the type and thickness of the paint, multiple applications of TSP may be required, along with scraping or sanding to remove the paint completely.
While TSP can be effective for stripping glossy paint, it’s essential to use it carefully and follow safety guidelines to achieve the desired results without causing harm to yourself, the surface being worked on, and the environment.
Understanding semi-gloss paint
Semi-gloss paint is a paint finish that falls between flat (or matte) and high-gloss finishes in terms of sheen and reflectivity. Here are some characteristics, uses, and challenges associated with semi-gloss paint:
Characteristics
- Sheen – Semi-gloss paint has a moderate level of sheen, typically reflecting more light than matte finishes but less than high-gloss finishes. This subtle shine gives it a smooth, polished appearance.
- Durability – Semi-gloss paint is more durable and washable than flat/matte paint finishes. It resists stains, moisture, and mildew better, making it suitable for rooms prone to moisture, such as bathrooms, kitchens, and trim work.
- Coverage – It provides good coverage and is relatively easy to apply. It hides imperfections in the surface better than high-gloss paint but may still highlight minor flaws due to its moderate sheen.
- Cleanability – Semi-gloss paint is easier to clean than matte finishes. Its smooth surface allows for easier removal of dirt, stains, and grease with mild soap and water.
- Reflectivity – While it doesn’t reflect light as much as high-gloss paint, semi-gloss still has a reflective quality that can help brighten a room and make surfaces appear more vibrant.
Uses
- Trim and woodwork – Semi-gloss paint is used on trim, baseboards, doors, and window frames to contrast and highlight architectural details.
- Kitchen and bathroom walls – Due to its ability to resist moisture and clean easily, semi-gloss paint is often used in kitchens and bathrooms, which have a higher chance of exposure to water and steam.
- High-traffic areas – It’s suitable for walls in high-traffic areas like hallways and children’s rooms where frequent cleaning may be necessary.
- Furniture and cabinets – Semi-gloss paint can be used to finish furniture and cabinets, providing a durable and washable surface.
Challenges of repainting over semi-gloss paint
- Surface preparation – One challenge of repainting with semi-gloss paint is ensuring proper surface preparation. Any existing paint or surface imperfections, such as bumps, cracks, or uneven texture, may be more noticeable with a semi-gloss finish. Therefore, thorough cleaning, sanding, and priming are essential to achieve a smooth and even surface.
- Adhesion – Semi-gloss paint may have difficulty adhering to certain surfaces, especially if they are glossy or non-porous. Proper priming or using a bonding primer can help improve adhesion.
- Brush marks and roller lines – Achieving a smooth and streak-free finish with semi-gloss paint can be challenging, as brush marks and roller lines may be more visible due to the paint’s reflective quality. Using high-quality brushes and rollers and applying thin, even coats can help minimize these issues.
- Drying time – Semi-gloss paint may take longer to dry than flat/matte finishes, and multiple coats may be required to achieve full coverage and desired sheen level. Adequate drying time between coats is necessary to prevent streaking or lifting of the paint.
While semi-gloss paint offers durability, washability, and a subtle sheen, proper surface preparation and application techniques are essential to overcome challenges associated with repainting surfaces with this type of paint.
How effective is TSP in stripping off glossy paints?
Trisodium phosphate (TSP) is used as a cleaning agent and degreaser. Still, its effectiveness in stripping glossy paints can vary based on the paint, the surface it’s applied to, and the concentration of the TSP solution.
When preparing a glossy surface for new paint, TSP can effectively remove glossy paints, especially if they are oil-based or enamel paints. It works by breaking down the bonds in the paint, making it easier to remove. However, TSP may be less effective for water-based paints or specialty coatings.
When using TSP to strip paint, follow safety precautions and manufacturer instructions. Also, test it in a small, inconspicuous area first to ensure it doesn’t damage the surface. TSP can be harsh on the environment, so proper disposal methods should be followed.
While TSP can effectively strip glossy paints, its success can vary depending on each specific circumstance. In some cases, other paint-stripping methods or products may be more suitable.
Painting over semi-gloss paint
Painting over a semi-gloss surface requires proper preparation, priming, selecting the right paint, and employing correct painting techniques to achieve a smooth and long-lasting finish. Here are the steps to follow:
Step 1: Preparation
- Clean the surface – Remove any dirt, dust, or grease on the surface using a mild detergent solution and water. Rinse the surface thoroughly and allow it to dry completely.
- Sand the surface – Lightly sand the semi-gloss surface with fine-grit sandpaper (around 120 grit) to create a rough surface for better paint adhesion. Wipe the sanding dust away with a damp cloth.
- Repair imperfections – Fill any cracks, holes, or dents with a suitable filler or spackling compound. Allow it to dry completely, and sand it smooth, removing any dust afterward.
- Protect surrounding areas – Use painter’s tape to mask off areas you don’t want to paint, such as trim or adjacent walls.
Cleaning with TSP
Here’s a step-by-step guide on how to properly apply TSP for cleaning surfaces:
Step 1: Gather supplies
Gather the following essential supplies:
- TSP (trisodium phosphate)
- Safety gear: rubber gloves, safety goggles, and a mask (especially if working in a poorly ventilated area)
- Bucket
- Stir stick
- Sponge or scrub brush
- Clean water for rinsing
- Drop cloths and plastic sheeting to protect floors and surrounding areas
- Ladder (if necessary for high surfaces)
Step 2: Prepare the area
- Remove any furniture, decorations, or items from the work area.
- Cover the floor with drop cloth or plastic sheeting to protect the floor and other surfaces from drips or spills.
Step 3: Dilute TSP
- Read the manufacturer’s instructions on the TSP packaging carefully to determine the correct dilution ratio. Typically, you’ll mix about 1/2 cup of TSP per gallon of warm water. Use a bucket to mix the solution.
Step 4: Put on safety gear
- Wearing rubber gloves, safety goggles, and a mask will protect your skin, eyes, and lungs from TSP exposure.
Step 5: Test an inconspicuous area
- Before applying TSP to the entire surface, test it in a small, inconspicuous area to confirm it doesn’t damage or discolor the material.
Step 6: Apply TSP solution
- Dip a sponge or brush into the TSP solution and apply it to the surface. Work in small sections to ensure thorough coverage.
Step 7: Scrub the surface
- Use a sponge or brush to scrub the surface vigorously. Pay extra attention to areas with heavy grease, grime, or stains.
Step 8: Rinse thoroughly
- After scrubbing, rinse the surface thoroughly with clean water. You may need to rinse multiple times to remove all traces of TSP.
Step 9: Repeat if necessary
- You may need to repeat the cleaning process using a fresh TSP solution for heavily soiled surfaces.
Step 10: Allow to dry
- Once the surface is clean, allow ample time to dry completely before painting, wallpapering, or other finishes.
Step 11: Dispose of the TSP solution properly
- TSP is a strong chemical and should be disposed of properly, following local regulations. Do not pour TSP solution down the drains or into the environment. Instead, follow your local guidelines for hazardous waste disposal.
Step 12: Clean up
- Clean your tools and equipment with water and soap immediately after use. Rinse out the bucket thoroughly.
Step 13: Wash your hands
- After handling TSP or cleaning solutions, wash your hands thoroughly with soap and water.
Safety precautions when cleaning with TSP and protective gear recommendations
Trisodium phosphate (TSP) is a powerful cleaner often used to prep surfaces before painting. When cleaning walls with TSP, following safety precautions to protect yourself and others from potential hazards is crucial. Here are some safety precautions and protective gear recommendations:
- Read the instructions – Before using TSP, carefully read the instructions and warnings provided on the product by the manufacturer. Follow the recommended dilution ratios and application methods.
- Ventilation – Adequate ventilation is required in the area where you’ll be working. Open all windows and doors to allow fresh air to circulate. This helps to minimize inhalation of fumes.
- Protective clothing – Wear chemical-resistant gloves, long-sleeved shirts, and long pants to protect your skin from direct contact with TSP solution.
- Eye protection – Wear safety glasses, goggles, or a face shield to protect your eyes from splashes or fumes. TSP can cause irritation or damage to the eyes upon contact.
- Respiratory protection – If the area is poorly ventilated or workers are sensitive to strong odors, consider wearing a respirator mask rated for chemical fumes to prevent inhalation of TSP vapors.
- Avoid mixing with other chemicals – Do not mix TSP with other cleaning agents, especially those containing ammonia or chlorine bleach. Mixing chemicals can produce toxic fumes or hazardous reactions.
- Protect surrounding surfaces – Cover nearby surfaces, furniture, floors, and features that cannot be moved with drop cloths or plastic sheets to prevent accidental spills or splashes from damaging them.
- Precautions for disposal – Dispose of TSP solution and cleaning materials according to local regulations. Do not pour the excess solution down drains or into water sources.
- Keep out of reach of children and pets – Store TSP and any leftover solution securely out of reach of children and pets. Avoid leaving containers of TSP unattended.
- Wash hands thoroughly – After cleaning, wash your hands and all exposed skin with soap and water to remove any traces of TSP solution.
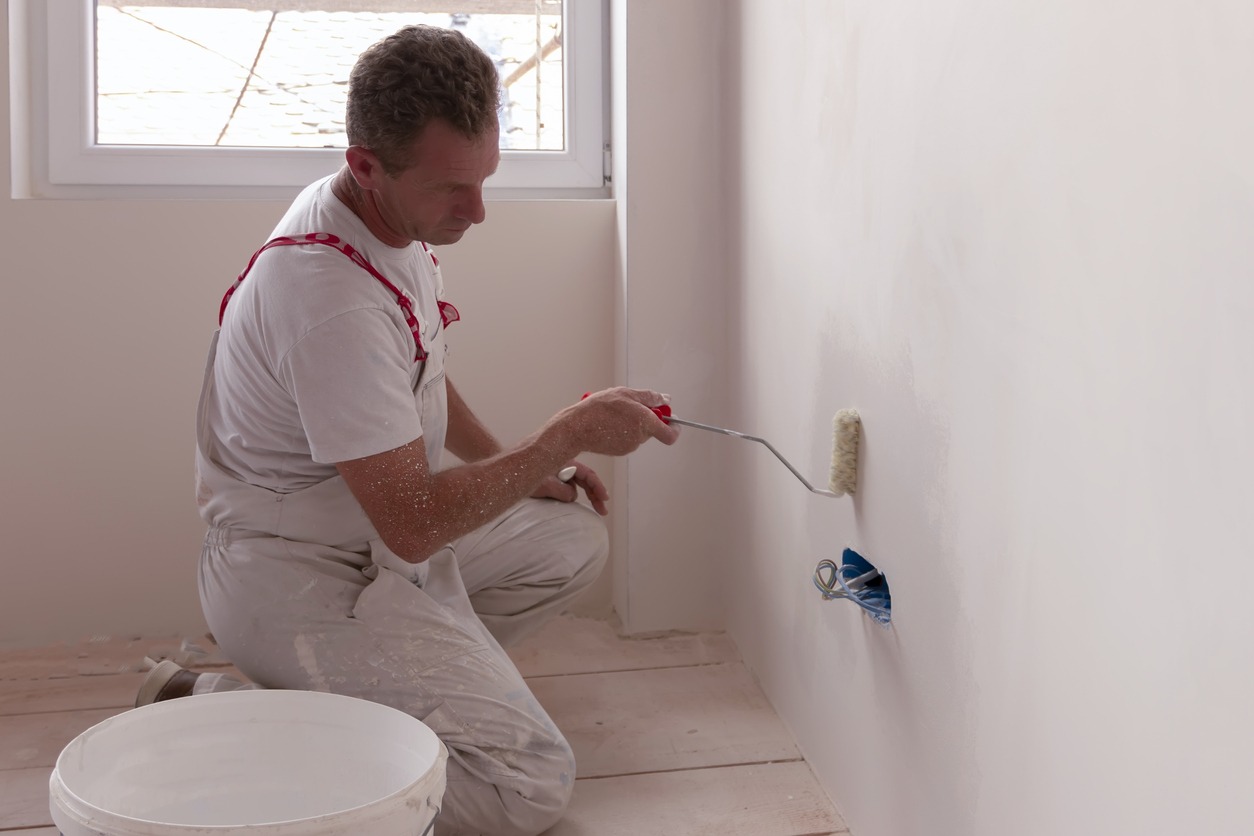
Step 2: Priming
- Select the right primer – Choose a primer suitable for the surface material and the type of paint you’ll be using. An oil-based or shellac-based primer is typically recommended for a semi-gloss surface to ensure good adhesion.
- Apply primer – Stir the primer thoroughly before use. Apply the primer evenly over the surface using a high-quality brush or roller. Ensure full coverage, but avoid applying too thickly to prevent drips or runs. Follow the manufacturer’s recommendations regarding drying times and recoating.
- Spot prime if necessary – If there are particularly glossy or stubborn areas, you may need to spot prime them with an additional coat of primer before proceeding with the main priming.
Step 3: Choosing the right paint
- Select a suitable paint – For painting over a semi-gloss surface, choose a high-quality latex or acrylic paint with a finish appropriate for your desired result (e.g., satin, eggshell, or matte). Make sure the paint is compatible with the primer you’ve used.
- Consider primer and paint compatibility – If you’ve used an oil-based primer, use a compatible latex or oil-based paint. If you’ve used a latex primer, opt for a latex paint.
Step 4: Painting techniques
- Stir the paint – Before painting, stir the paint thoroughly to ensure an even consistency.
- Cut in – Begin by “cutting in” around the edges of the surface with a brush, painting carefully along trim, corners, and edges where a roller may not reach easily.
- Roll the paint – Use a high-quality roller to apply to larger surface areas. Work in manageable sections, overlapping slightly with each stroke to avoid visible seams. Apply paint evenly and avoid excessive rolling to prevent drips.
- Maintain a wet edge – To prevent lap marks; it helps to always work with a “wet edge,” meaning you should paint into the area you’ve just painted while it’s still wet to blend the edges seamlessly.
- Allow proper drying time – Follow the paint manufacturer’s instructions regarding drying times between coats. Typically, you’ll need to wait for the first coat to be completely dry before applying additional coats.
- Apply additional coats if necessary – Depending on the coverage and desired finish, you may need multiple coats of paint, allowing each coat to dry completely before applying another. If painting more than two layers, let each coat dry before adding the next.
- Remove painter’s tape carefully – Once the paint is dry to the touch, carefully remove the painter’s tape at a 45-degree angle to ensure clean lines.
- Allow sufficient cure time – After the final coat of paint, allow adequate time for the paint to cure fully before subjecting it to any wear or cleaning.
The importance of multiple thin coats over one thick coat
Applying several thin coats of paint instead of one thicker coat is a fundamental principle in painting that offers several advantages:
- Better coverage – Thin coats allow for better coverage over the painted surface. Thick coats may lead to uneven coverage, especially on textured surfaces or areas with imperfections.
- Smooth finish – Multiple thin coats help achieve a smoother finish than one thick coat. Thick coats can result in drips, sags, and an uneven texture, whereas thin coats dry more evenly and result in a smoother surface.
- Reduced drying time – Thin coats dry more quickly than thick coats. This means that you can apply subsequent coats sooner, reducing overall painting time. Thick coats take longer to dry and may require additional waiting time between coats.
- Minimized runs and drips – Thick coats are more prone to runs and drips, especially on vertical surfaces. Multiple thin coats reduce the risk of these issues, resulting in a cleaner, more professional-looking finish.
- Improved adhesion – Thin coats adhere better to the surface underneath. Thick coats can have difficulty adhering properly, leading to peeling, cracking, or flaking over time.
- Easier corrections – If you make a mistake or need to touch up an area, it’s easier to correct with multiple thin coats. Thick coats may require more extensive sanding or stripping to fix errors.
- Optimized paint consumption – Thin coats use paint more efficiently. While it might seem like you’re using more paint with multiple coats, you’re likely to use less overall than applying one thick coat because thick coats often waste paint due to uneven application and drips.
- Professional results – Overall, applying multiple thin coats of paint yields a more professional-looking result. Experienced painters commonly use this technique because it produces smoother, more consistent finishes with fewer imperfections.
Common mistakes to avoid
Painting over a semi-gloss surface can be tricky due to its smooth and shiny finish. Here are some common mistakes to avoid and their solutions:
Failure to prepare the surface properly
- Mistake – Not cleaning or sanding the surface before painting can lead to poor adhesion and a patchy finish.
- Solution – Clean the surface thoroughly with a degreasing cleaner to remove dirt or grease. Lightly sand the surface to create a rougher texture, which can help the new paint adhere better.
Using the wrong type of paint
- Mistake – Using paints unsuitable for glossy surfaces can result in poor coverage and adhesion.
- Solution – Choose a high-quality primer specifically formulated for glossy surfaces. Additionally, use high-quality paint with good adhesion properties, such as a bonding primer or paint labeled for use on shiny surfaces.
Skipping the primer
- Mistake – Skipping the primer when painting over a semi-gloss surface can lead to poor adhesion and an uneven finish.
- Solution – Always use a primer designed for glossy surfaces before applying the paint. This will ensure better adhesion and a smoother finish.
Applying too thick of a coat
- Mistake – Applying too thick of a coat of paint can result in drips, streaks, and an uneven finish.
- Solution – Apply multiple thin coats of paint instead of one thick coat. This allows the paint to dry more evenly and reduces the likelihood of drips and streaks.
Not allowing sufficient drying time
- Mistake – Not allowing each coat of paint to dry completely before the next coat can result in a tacky finish and poor adhesion.
- Solution – Follow the drying time recommendations on the paint can and allow each coat to dry thoroughly before applying the next coat. This ensures proper adhesion and a smoother finish.
Using the wrong application technique
- Mistake – Using the wrong painting technique, such as applying too much pressure or using the wrong brush or roller, can result in an uneven finish.
- Solution – Use a high-quality brush or roller specifically designed for the type of paint you are using. Apply the paint in thin, even coats using smooth, overlapping strokes to achieve a uniform finish.
Not maintaining proper ventilation
- Mistake – Painting in a poorly ventilated area can result in fumes building up and affecting the drying process and the quality of the finish.
- Solution – Ensure proper ventilation by opening windows and doors or using fans to circulate the air. This helps the paint dry more quickly and reduces the risk of fumes building up.
Aftercare and maintenance
Ensuring the longevity of a newly painted surface and properly maintaining different paint finishes involves a combination of proper application techniques, regular maintenance, and appropriate cleaning methods. Here are some tips:
1. Prepare the surface properly – Before painting, make sure the surface is clean, dry, and free of any dirt, grease, or loose particles. Proper surface preparation ensures better adhesion and longevity of the paint.
2. Use high-quality paint – Invest in good-quality paint and materials. Quality paint provides better coverage and durability and tends to last longer.
3. Follow manufacturer’s instructions – Always follow the manufacturer’s instructions regarding application, drying times, and recommended environmental conditions (temperature, humidity) for painting. This ensures optimal performance and longevity of the paint.
4. Apply primer – Primer helps to seal the surface, improves paint adhesion, and provides a more uniform finish. Using a primer appropriate for the surface you’re painting can extend the life of your paint job.
5. Apply multiple coats – Apply several thin coats of paint rather than one thick coat. This ensures better coverage and durability. Allow each coat to dry completely before applying the next.
6. Protect from harsh elements – If the painted surface is exposed to harsh elements such as sunlight, rain, or extreme temperatures, consider using paints specifically formulated for exterior use and applying a protective clear coat or sealer.
7. Regular maintenance – Inspect painted surfaces for any signs of wear, damage, or peeling. Address any issues promptly to prevent further deterioration.
8. Cleaning different paint finishes:
- Flat/matte finish: These are less durable and more prone to staining. Clean with mild soap and water using a soft sponge or cloth. Avoid abrasive cleaners or scrubbing, as they can damage the finish.
- Eggshell/satin finish: These are more durable than flat/matte finishes and can withstand gentle cleaning with mild soap and water. Use a soft sponge or cloth and avoid abrasive cleaners.
9. Avoid abrasive cleaning tools – When cleaning painted surfaces, avoid using abrasive cleaning tools such as steel wool or rough scrub brushes, as they can scratch or damage the paint finish.
10. Test cleaning products – Before using any cleaning product on a painted surface, test it in an inconspicuous area to ensure it doesn’t cause damage or discoloration.
Conclusion
Trisodium phosphate, or TSP, is an effective cleaning agent. Its paint-stripping capabilities are so strong that it can peel old glossy paints and stains from the surface, making TSP ideal for cleaning surfaces in preparation for painting. While TSP can be effective for stripping glossy paints, remember to use it cautiously. Always follow safety guidelines to achieve the desired results without causing harm to yourself, the surface you work on, and the environment.
Call Custom Painting, Inc. at 925-294-8062 or fill out our online form for more expert paint advice or to schedule a time to speak with us for an estimate. Our paint experts will arrive at the scheduled time and provide you with a detailed job quote for your project.