Removing and replacing wallpaper can dramatically transform the look of a room, but the process requires proper preparation, patience, and the right tools. Different wallpaper types require different removal methods, and preparing the wall correctly is essential before installing new wallpaper or applying paint. Whether you’re considering updated wallpaper designs or exploring paint as an alternative, understanding the removal and installation process can help you achieve professional-looking results and avoid costly mistakes.
Key Takeaways
- Identify your wallpaper type before attempting removal.
- Proper workspace preparation helps protect floors, furniture, and electrical fixtures.
- Traditional wallpaper often requires scoring, moisture, or steam for effective removal.
- Wall repairs and priming are important before installing new wallpaper or painting.
- Pattern matching and proper alignment are critical during installation.
- Paint remains a popular alternative for homeowners seeking easier maintenance and future updates.
- Professional wallpaper removal services can save time and help prevent drywall damage.
Wallpaper can be a delightful addition to your home, lending character, color, and texture to your walls. However, as personal tastes change and design trends evolve, there often comes a time when you wish to bid farewell to the old patterns and welcome in a fresh look.
Updating your wallpaper can breathe new life into a room, transforming it from dated to dazzling, or from dull to delightful. Whether you are a seasoned DIY enthusiast or a complete novice, understanding the intricacies of wallpaper removal and replacement can make the process smoother and more rewarding.
In this article, we are going to provide you with more information about removing and replacing wallpaper.
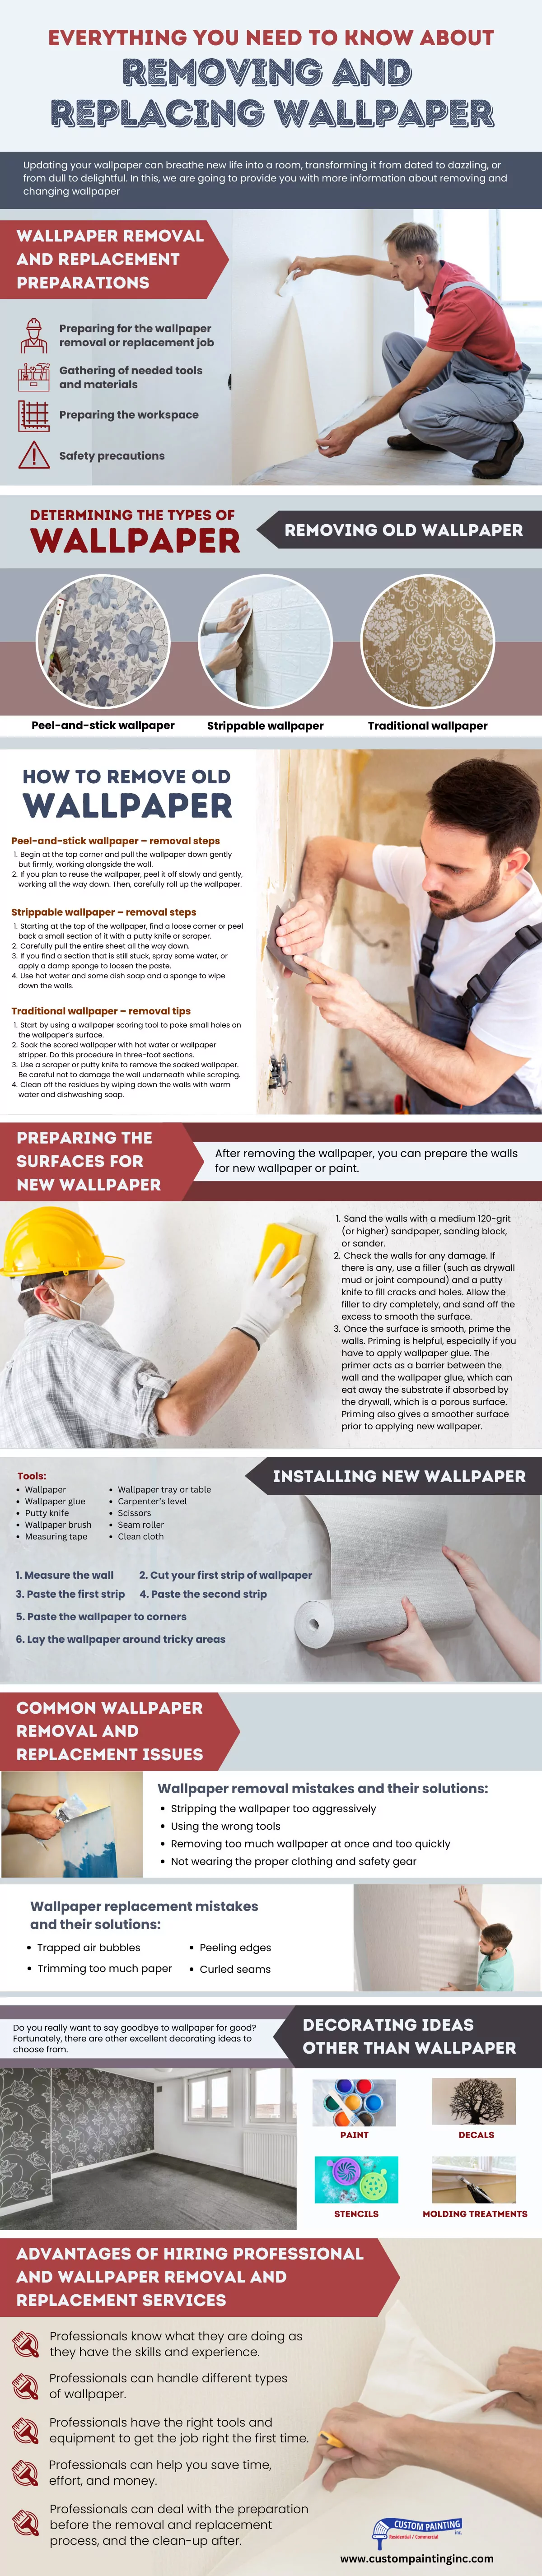
Wallpaper removal and replacement preparations
Preparing for the wallpaper removal or replacement job
Before everything else, it is important to remember the following:
- Removing wallpaper is going to be a messy job.
- Since wallpaper removal involves using a liquid, it is going to be a wet (or at least, damp) affair.
- Removing wallpaper will also likely test your endurance and patience, so you may want to be physically and mentally prepared for it.
- If you are going the DIY route (instead of hiring professional help with wallpaper removal), plan a proper schedule for the job. Give yourself a weekend or some days, give or take, depending on the square footage or the number of rooms you are working on.
Gathering of needed tools and materials
You may require any or all of the following tools, depending on the type of wallpaper you’re dealing with:
- Drop cloths
- Plastic sheeting
- Electrical tape
- Rubber gloves
- Putty knife or scraper
- Garden sprayer, spray bottle, or paint roller
- Wallpaper scoring tool (if necessary)
- Steamer (optional)
- Sandpaper, sanding block, or electric sander
Materials:
- Wallpaper stripper
- Hot water
- Dishwashing soap
- Tri-sodium phosphate (TSP)
Preparing the workspace
Just like with painting, preparing the work area before stripping wallpaper ensures the best results. It is important to get your space clear of any obstructions and ready for the job. You will want to protect the flooring, light switches, electrical outlets, and other surfaces since you are going to spray water or stripping solution onto the walls. Follow the preparation steps here:
- Remove wall décor and fixtures.
- Remove curtains or drapes.
- Move furniture to the center of the room or out of the room (if possible).
- Cover the remaining furniture with drop cloths or plastic sheeting.
- Shut off the electricity in the work area.
- Cover light switches and outlets with painter’s tape.
- Lay down the drop cloths on the floor.
- Tape the drop cloths down to keep them in place.
Safety precautions
In every home improvement job, safety is a top priority. Before stripping your old wallpaper, make sure you have turned off the power in the area you’re working in to prevent the water from getting into light switches and electrical outlets.
You should also wear protective gear, such as gloves, safety goggles, and a dust mask or respirator. Make sure that the space is well-ventilated by keeping the windows and doors open and using fans to maintain air flow. This allows the foul air to flow out and the fresh air to come in.
Removing old wallpaper
Determining the types of wallpaper
In order to remove your old wallpaper more safely and effectively, it helps to determine which type it is.
- Peel-and-stick wallpaper – It is one of the latest types of wallpaper on the market. It has a ready-to-use adhesive on the back, which allows it to stick to the wall easily, working just like a giant sticker. It is also made to be peeled off easily without leaving any residue on the wall and causing damage to its surface, so there’s no need for a special tool or method to remove it. Once the wallpaper is removed, it can be used again as long as its adhesive backing is preserved. Easy installation, removal, and reusability are the selling points of peel-and-stick wallpaper, which has grown in popularity in recent years.
- Strippable wallpaper – Strippable wallpaper has a pre-pasted backing. It can be dry-stripped, leaving some adhesive residue or paper backing on the wall. Other than that, it doesn’t cause significant damage to the wall’s surface. However, you do have to remove the residues to leave the walls completely clean and ready for refinishing work.
- Traditional wallpaper – Traditional wallpaper is usually made from non-woven materials. It is a long-lasting type of wallpaper and made to stick to the walls permanently. However, this is the most difficult wallpaper to remove, requiring the use of water, steam, chemicals, or other methods. Therefore, the process is generally laborious and time-consuming. If the removal is not done properly and carefully, it can cause significant damage to drywall.
How to remove old wallpaper
Now that you have figured out the type of wallpaper that’s currently on your walls, you have a fair idea of how to remove it in the best way possible. With the right tools and proper methods, you will be able to strip the old wallpaper successfully, leaving the walls ready for new wallpaper or paint.
Peel-and-stick wallpaper – removal steps
- Begin at the top corner and pull the wallpaper down gently but firmly, working alongside the wall.
- If you plan to reuse the wallpaper, peel it off slowly and gently, working all the way down. Then, carefully roll up the wallpaper. Make sure that its adhesive side is clear of any dirt or anything else that can compromise its stickiness. Then store the wallpaper in a cool and dry place.
Strippable wallpaper – removal steps
- Starting at the top of the wallpaper, find a loose corner or peel back a small section of it with a putty knife or scraper.
- Carefully pull the entire sheet all the way down. Make sure to keep your hands close to the sections still attached to the wall.
- If necessary, spray the front of the wallpaper with water or wallpaper stripper to help activate the adhesive and facilitate the stripping.
- Repeat the first three steps until you have removed all the wallpaper.
- If you find a section that is still stuck, spray some water, or apply a damp sponge to loosen the paste.
- Use hot water, some dish soap, and a sponge to wipe down the walls, cleaning away any leftover bits of glue that didn’t come off when you removed the wallpaper.
Traditional wallpaper – removal tips
- Start by using a wallpaper scoring tool to poke small holes in the wallpaper’s surface. The holes will allow the hot water or wallpaper stripper to penetrate the wallpaper and reach the adhesive.
- Soak the scored wallpaper with hot water or a wallpaper stripper. Do this procedure in three-foot sections. Another option is to use a wallpaper steamer. It’s better to rent one because you won’t use it very often.
- Tip: If the wallpaper is installed on drywall, be careful not to oversaturate it or soak it for long periods. Get the wallpaper damp enough to be removable, but oversaturating or soaking it for too long can cause damage to your drywall.
- Use a scraper or putty knife to remove the soaked wallpaper. Be careful not to damage the wall underneath while scraping.
- Clean off the residues by wiping down the walls with warm water and dishwashing soap. Or make a solution of hot water and a small amount of TSP. Use either solution by dabbing it with a sponge or spraying it, and then rinse it with clean water. Let the walls sit for a few days to dry completely.
Removing old wallpaper
Determining the types of wallpaper
In order to remove your old wallpaper more safely and effectively, it helps to determine which type it is.
- Peel-and-stick wallpaper – It is one of the latest types of wallpaper on the market. It has a ready-to-use adhesive on the back, which allows it to stick to the wall easily, working just like a giant sticker. It is also made to be peeled off easily without leaving any residue on the wall and causing damage to its surface, so there’s no need for a special tool or method to remove it. Once the wallpaper is removed, it can be used again as long as its adhesive backing is preserved. Easy installation, removal, and reusability are the selling points of peel-and-stick wallpaper, which has grown in popularity in recent years.
- Strippable wallpaper – Strippable wallpaper has a pre-pasted backing. It can be dry-stripped, leaving some adhesive residue or paper backing on the wall. Other than that, it doesn’t cause significant damage to the wall’s surface. However, you do have to remove the residues to leave the walls completely clean and ready for refinishing work.
- Traditional wallpaper – Traditional wallpaper is usually made from non-woven materials. It is a long-lasting type of wallpaper and made to stick to the walls permanently. However, this is the most difficult wallpaper to remove, requiring the use of water, steam, chemicals, or other methods. Therefore, the process is generally laborious and time-consuming. If the removal is not done properly and carefully, it can cause significant damage to drywall.
How to remove old wallpaper
Now that you have figured out the type of wallpaper that’s currently on your walls, you have a fair idea of how to remove it in the best way possible. With the right tools and proper methods, you will be able to strip the old wallpaper successfully, leaving the walls ready for new wallpaper or paint.
Peel-and-stick wallpaper – removal steps
- Begin at the top corner and pull the wallpaper down gently but firmly, working alongside the wall.
- If you plan to reuse the wallpaper, peel it off slowly and gently, working all the way down. Then, carefully roll up the wallpaper. Make sure that its adhesive side is clear of any dirt or anything else that can compromise its stickiness. Then store the wallpaper in a cool and dry place.
Strippable wallpaper – removal steps
- Starting at the top of the wallpaper, find a loose corner or peel back a small section of it with a putty knife or scraper.
- Carefully pull the entire sheet all the way down. Make sure to keep your hands close to the sections still attached to the wall.
- If necessary, spray the front of the wallpaper with water or wallpaper stripper to help activate the adhesive and facilitate the stripping.
- Repeat the first three steps until you have removed all the wallpaper.
- If you find a section that is still stuck, spray some water, or apply a damp sponge to loosen the paste.
- Use hot water and some dish soap and a sponge to wipe down the walls, cleaning away some leftover bits of glue that didn’t come off when you removed the wallpaper.
Traditional wallpaper – removal tips
- Start by using a wallpaper scoring tool to poke small holes on the wallpaper’s surface. The holes will allow the hot water or wallpaper stripper to penetrate the wallpaper and reach the adhesive.
- Soak the scored wallpaper with hot water or a wallpaper stripper. Do this procedure in three-foot sections. Another option is to use a wallpaper steamer. It’s better to rent one because you won’t use it very often.
- Tip: if the wallpaper is installed on drywall, be careful not to oversaturate it or soak for long periods. Get the wallpaper damp enough to be removable, but oversaturating or soaking it for too long can cause damage to your drywall.
- Use a scraper or putty knife to remove the soaked wallpaper. Be careful not to damage the wall underneath while scraping.
- Clean off the residues by wiping down the walls with warm water and dishwashing soap. Or make a solution of hot water and a small amount of TSP. Use either solution by dabbing it with a sponge or spraying it, and then rinse it with clean water. Let the walls sit for a few days to dry completely.
Preparing the surfaces for new wallpaper
After removing the wallpaper, you can prepare the walls for new wallpaper or paint.
- Sand the walls with a medium 120-grit (or higher) sandpaper, sanding block, or sander.
- Check the walls for any damage. If there is any, use a filler (such as drywall mud or joint compound) and a putty knife to fill cracks and holes. Allow the filler to dry completely, and sand off the excess to smooth the surface.
- Once the surface is smooth, prime the walls. Priming is helpful, especially if you have to apply wallpaper glue. The primer acts as a barrier between the wall and the wallpaper glue, which can eat away the substrate if absorbed by the drywall, which is a porous surface. Priming also gives a smoother surface prior to applying new wallpaper.
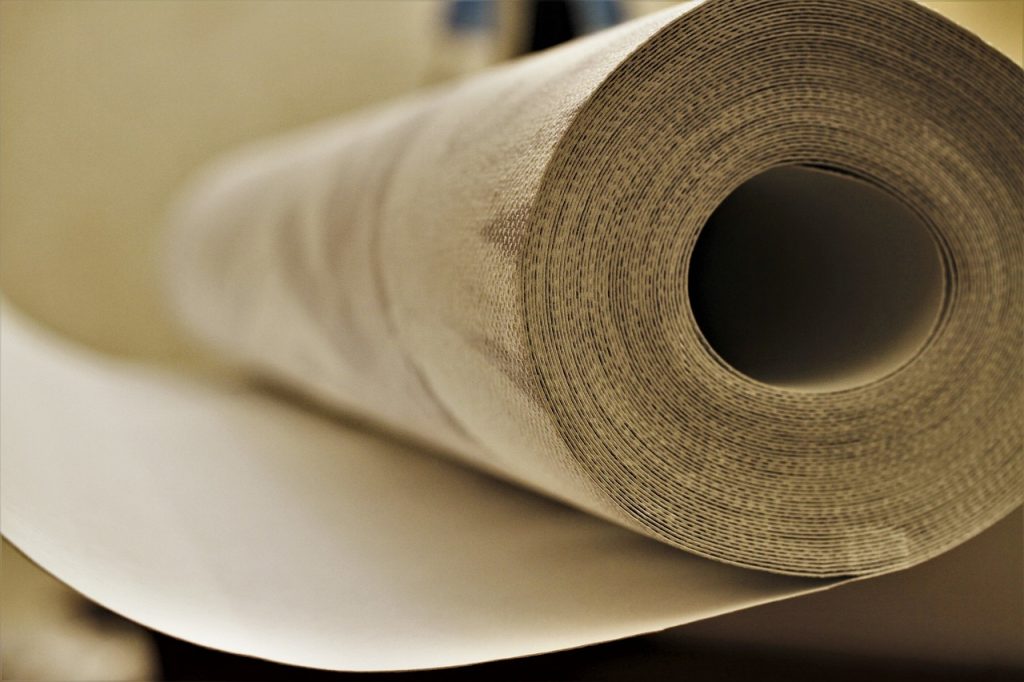
Installing new wallpaper
Once the walls are clean, smooth, and clear of residues or surface flaws, you’re ready to redecorate your room with new wallpaper of your choice.
If this is your first time installing wallpaper, it can be daunting. Depending on your chosen wallpaper, installing it can be easy, especially if you have the patience, precision, and the right tools. Those are the key factors to hanging straight, plumb, and perfectly aligned wallpaper.
Tools:
- Wallpaper
- Wallpaper glue
- Putty knife
- Wallpaper brush
- Measuring tape
- Wallpaper tray or table
- Carpenter’s level
- Scissors
- Seam roller
- Clean cloth
1) Measure the wall
Measure your wall to make sure of how long your wallpaper should be. While measuring, add around 20 centimeters to make leeway at the top or bottom. This is helpful, especially for covering up incorrect measurements.
2) Cut your first strip of wallpaper
Unroll your new wallpaper and spread it gently across the table. Using a light pencil, make marks and draw lines on where the wallpaper should be cut. Then, cut the wallpaper lightly and carefully – this is going to be your first strip.
3) Paste the first strip
To prepare the wall for the first strip of wallpaper, draw a vertical line on the area to be wallpapered by using a carpenter’s level and pencil. The line will serve as your guide when you paste your first strip.
Next, apply a generous amount of glue on the wall – not on the wallpaper. Some wallpaper comes with adhesive, so you don’t have to apply glue.
Apply your first strip of wallpaper on the wall carefully and gently. Lay it from the top of the wall and then smooth it down using a wallpaper brush or clean cloth. Leave out around 2 inches hanging at the top of the wall (close to the ceiling) and below (the floor). Press the wallpaper firmly, creating a faint line that will serve as your marking. This makes it easy to trim the excess wallpaper.
Begin smoothing down from the middle of the paper to the edges. If it’s your first time hanging wallpaper, the first strip may not come out perfectly. If that’s the case, peel it off gently and repeat pasting again if need be. Just make sure to avoid creating a crease in the wallpaper. If a wrinkle or crease is forming, pull the paper off the wall gently. And when it gets to the creased or wrinkled areas, smooth them out slowly.
4) Paste the second strip
Pasting the second strip of wallpaper may be harder than the first, especially if the wallpaper comes with designs and patterns. You have to match the patterns and you also want to avoid overlay. With patterned wallpaper, be prepared to match up and expect some wastage. But with plain wallpaper, you can lay it in whatever way you wish.
Unroll the wallpaper and line it up against the first strip on the wall. If your wallpaper is patterned, match the patterns from the center and make sure you get it sufficiently close.
Pay attention to matching the patterns. Make sure the wallpaper doesn’t overlap and that the second strip meets the first at the edge. Like in the first strip, leave out a few inches at the top and bottom. If necessary, press and seal the seams with a seam roller. Let the roller sit for around 5 minutes before wiping it off. Avoid pressing on the wallpaper too hard so as not to push the glue out from underneath.
5) Paste the wallpaper to the corners
Place your wallpaper around the next wall for the corners. You must meet up the patterns at the edges as you did before. Then, press the paper gently with a wallpaper brush or cloth.
After the first wall is correctly lined to the corner, use a pair of scissors to create a small incision at the top where the corner meets the ceiling. The incision will make folding the paper easier. Repeat the same process for the bottom, where the corner meets the floor, before moving to the second wall. Press the wallpaper with a wallpaper brush or cloth. Remember to do this carefully and make sure that the paper doesn’t pull away from the other edge. If it does, gently pull it out and try again.
6) Lay the wallpaper around tricky areas
For laying around tricky areas like light switches and outlets, place the wallpaper over them. Don’t press the strip down too much on such areas. Cut the paper through at the center point with your scissors. Next, press the wallpaper down and smooth it around the edges of the light switch or outlet. When the wallpaper has settled, the shape of the light switch or outlet will appear more definite. Then, cut the excess paper with a knife.
For placing wallpaper around a door, place your wallpaper over the door frame. Make sure that the wallpaper’s pattern matches the previously installed ones. Then, feel the outline of the frame and press into it to fold the paper around the frame’s shape. For the top of the door frame, cut a diagonal line from the wallpaper’s edge to just past the frame’s corner. Smooth the paper into place so that the edge piece pokes out. Once the wallpaper is in place, cut the excess overhanging paper away. Repeat the process around the entire door frame.
For wallpapering around a recessed window frame, first hang the wallpaper to match it up with the previously installed ones. Use a pencil to make a mark on the wall where the wallpaper’s width ends. Remove the paper.
Next, apply a paste on the inside of the window’s top recess and lay a reasonably sized patch of wallpaper on it. Use scissors to cut a diagonal line to meet the corner where the window’s recess starts. Cut away any excess. You should be left with only a wallpapered patch beneath the top recess that slightly overlaps onto the wall.
Paste the rest of the wall and apply a full strip of wallpaper. Smooth the paper down with a brush or cloth. Make a cut at the top of the recess’ edge, cutting through both the main strip and the patch underneath to make a clean edge. Next, carefully cut the paper along the sides of the window and fold it back to fit the reveal. Finally, smooth the rest of the wallpaper and cut away the excess at the top and bottom as needed.
Common wallpaper removal and replacement issues
Mistakes are bound to happen, even among experienced DIY home improvement hobbyists. Identifying common wallpaper removal and replacement issues can help you prevent disastrous mistakes and ensure that the job is done right.
Wallpaper removal mistakes and their solutions:
- Stripping the wallpaper too aggressively – Removing wallpaper can be a tedious task if you want to do the job quickly and then be done with it. But it’s better to take your time, stay calm, and be patient when stripping the wallpaper to avoid damaging the drywall and causing more removal mistakes.
- Using the wrong tools – Invest in quality tools made specifically for removing wallpaper.
- Removing too much wallpaper at once and too quickly – Remove some wallpaper at a time to avoid damaging the drywall.
- Not wearing the proper clothing and safety gear – Make sure you wear the proper safety gear that will keep you protected during the job. Wear clothing that you don’t mind getting dirty and that can be easily washed.
Wallpaper replacement mistakes and their solutions:
- Trapped air bubbles – Get a glue injector, knife, and seam adhesive. Start by making a small incision along the air bubbles, then inject some glue into it and press it down. Wipe off the excess glue with a clean cloth.
- Peeling edges – Peeling edges usually occur when there’s a rough surface underneath the wallpaper. Lift the paper and sand down the surface to make it smooth. Apply wallpaper glue to the surface and stick the wallpaper to it.
- Trimming too much paper – This mistake usually happens when you’re trying to cut excess wallpaper. Stick back the part you’ve just cut out, and then re-cut. Just make sure to meet the cut line but don’t overlap. The cut will no longer be noticeable once the wallpaper dries.
- Curled seams – Curled seams happen probably because you didn’t apply enough glue at the edges. To solve this issue, dampen the seam with warm water, lift the paper, and add some more paste underneath. Apply a little pressure to the seam to smooth it and wipe off the excess glue.
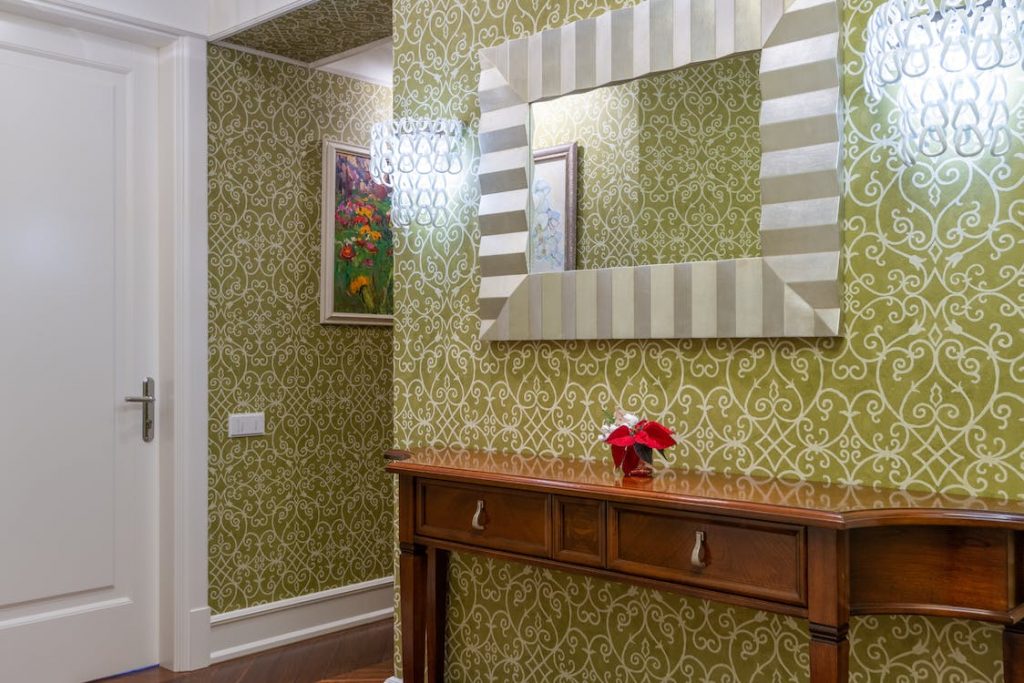
Decorating ideas other than wallpaper
Do you really want to say goodbye to wallpaper for good? Fortunately, there are other excellent decorating ideas to choose from.
- Paint – Painting your room can be a cost-effective way to decorate your room. One of the great things about painting is that it can change the perception of a room’s size and appearance. There are hundreds of paint colors, shades, and finishes to choose from. Custom Painting, Inc.’s team of interior painters in Dublin, CA, can help you through the process.
- Decals – Vinyl decals are great for those who constantly change the look of their space. There are many choices out there that can range from simple shapes to elaborate designs. Installing and removing vinyl decals is easy, and you can even reposition them.
- Stencils – Stenciling enables you to create a consistent pattern. It also offers a low-cost and low-stress application process. There are tons of stencil patterns to choose from, and you can even customize your own pattern to suit your taste.
- Molding treatments – Molding treatments are a fun and easy way to add character to your room. Today’s options don’t even require a carpentry degree or experience. With some simple cuts and paint, it will go a long way. While they’re a more permanent option than decals, moldings tend to be more appealing than wallpaper and can add value to your home when you resell it.
Advantages of hiring professional wallpaper removal and replacement services
Removing and replacing wallpaper tends to be complicated, laborious, and time-consuming – and this is where professionals come in. Here are some of the benefits you’ll get when you hire professional wallpaper removal and replacement services:
- Professionals know what they are doing as they have the skills and experience.
- Professionals can handle different types of wallpaper.
- Professionals have the right tools and equipment to get the job right the first time.
- Professionals can help you save time, effort, and money.
- Professionals can deal with the preparation before the removal and replacement process, and the clean-up after.
Wallpaper vs Paint: Which Is Right for You?
Choosing between wallpaper and paint involves balancing upfront costs against long-term durability. Paint is the more budget-friendly and DIY-accessible option, offering endless color flexibility and easy touch-ups for scuffs or stains. It typically lasts five to seven years and is ideal for high-moisture areas like kitchens or bathrooms where ventilation might be a concern.
In contrast, wallpaper is a premium investment that provides unmatched texture, patterns, and a “wow” factor that paint cannot replicate. While it requires a higher initial outlay for materials and professional installation, high-quality vinyl wallpaper can last up to 15 years, making it more cost-effective over its lifespan. However, wallpaper is less forgiving in humid environments and can be difficult to repair invisibly if torn.
For those who enjoy frequent decor updates, paint remains the superior choice due to its simplicity. For high-traffic commercial hallways or statement accent walls where longevity and distinct aesthetics are paramount, wallpaper is often the better strategic choice. Ultimately, the right decision depends on your room’s specific environment, your long-term maintenance preferences, and whether you prefer a quick DIY project or a lasting professional finish.
Conclusion
Removing old wallpaper can be a tricky process. After identifying the type of wallpaper that’s currently on the walls, the wallpaper removal follows. Then, you have to get the walls prepared for new wallpaper. Installation is not easy, either, because it involves precise measurements, matching, and placement of the new wallpaper. As a DIY-er, you will want to end up with the least amount of damage or wastage as much as possible.
But due to how complex wallpaper removal and replacement are, homeowners may not have the time and the expertise to do the job themselves without difficulties. They can run into several issues and spend a lot more to correct their mistakes. In the end, the costs end up higher than anticipated, but the results still leave so much to be desired.
Therefore, it is much better to hire professional wallpaper removal and replacement services.
For over 40 years in the business, Custom Painting, Inc. has been providing residential and commercial painting, light carpentry, and custom installation services to homes and businesses in the Bay Area. In addition to having the best painters in the Bay Area, we have wallpaper experts who will handle everything properly, thanks to their years of experience. Contact us today at 925-320-3242 or message us to get started!
FAQs
Is it better to remove wallpaper or paint over it?
In most cases, removing wallpaper is the preferred option. Painting over wallpaper can trap imperfections underneath the paint and may lead to peeling, bubbling, or visible seams over time.
Can wallpaper damage drywall during removal?
Yes. Traditional wallpaper can damage drywall if removed too aggressively or if excessive moisture is used during the removal process. Proper techniques help minimize damage.
Do I need to prime walls after removing wallpaper?
Yes. Priming helps seal repairs, creates a smooth surface, and improves adhesion for new wallpaper or paint.
What’s the difference between peel-and-stick wallpaper and traditional wallpaper?
Peel-and-stick wallpaper uses a self-adhesive backing and is designed for easier removal, making it popular among homeowners and renters. Traditional wallpaper generally requires adhesive and offers greater durability, but is more difficult to remove.
When should I hire a professional for wallpaper removal?
Professional assistance is often recommended when dealing with older wallpaper, multiple layers, damaged drywall, large rooms, high ceilings, or intricate wallpaper patterns.