Introduction
Water damage to ceilings can be a homeowner’s or business owner’s worst nightmare. Whether it’s the result of a sudden plumbing mishap, a leaky roof, or even a natural disaster, the consequences can range from unsightly stains to more severe structural issues. Ignoring water damage not only affects the aesthetics of your property but it also poses health and safety risks due to mold and weakened structures.
Fortunately, with the right knowledge and tools, repairing water-damaged ceilings is a task that can be tackled effectively. In this article, we will guide you through the essential steps to identify, assess, and repair water-damaged ceilings, restoring your space’s integrity and beauty. So, let’s roll up our sleeves and embark on the journey of revitalizing your damaged ceilings.
Signs of water damage on ceilings

Identifying signs of water damage in your ceiling is quite straightforward. If you’re concerned that your ceiling is likely damaged by water or moisture, here are several signs to look out for (apart from the obvious water leaking down from your ceiling):
- Watermarks or brown rusty stains (such as water rings)
- Mold along the corners, walls, and ceiling
- Wet or damp spots on the ceiling
- Sagging or bowed ceiling
- Wallpaper, baseboards, or trim separating from the walls
- “Sweating” walls
- Peeling, cracking, or bubbling paint
- A musty odor, which indicates the presence of mold or mildew
- Softened drywall
- Bulging drywall
- Warped or misshapen walls and ceilings
- Cracks in the ceiling
- A sudden and unexplained rise in your water bill
As your home gets older, it may start to show its signs in different ways. Older homes will typically begin to show their age through cracks in the walls or ceilings, allowing leaks. Unless these cracks get bigger and worse, they can be easily addressed through cosmetic repairs using joint compound and paint.
Identifying the extent of damage
You will want to know how far the water damage has gone. By watching out for any of the signs of water damage mentioned earlier, you can tell whether the damage has reached only the ceiling’s surface or has also affected the structural parts of your home.
Regardless of the extent of the damage, you must address it promptly. The earlier the detection, the better because it will mean less costly (and less risky) repairs.
- Inspect the affected area for signs of water damage or possible sources of water intrusion. The brown or rusty water rings are often one of the common signs of ceiling water damage. It may indicate a roof leak or a plumbing problem (if a bathroom is above the ceiling).
- Determine the severity of the damage. The sooner you can detect the severity of the damage, the better you’ll be able to address it. If the damage has not yet spread to the other parts of your home, it can be easily repaired to prevent further damage. But if the damage extends to the structural parts of the house, such as beams and ceiling joists, your concerns change from aesthetics to safety. Depending on how long the leak has gone unchecked, mold or wood rot may be present in your ceiling. Although you can take measures to repair minor damage, replacement is usually the better option, especially if these affected parts of your home are structurally significant.
Locating and addressing the source of water damage in the ceiling
It is important to locate and address the source of water damage in your ceiling. Otherwise, cosmetic repairs alone won’t prevent or stop water intrusion, which will continue to cause damage to your ceiling and possibly other parts of your home.
- Water leaking from the roof – The roof may have aged or deteriorated over time, that it can no longer offer adequate protection from the rainwater. In that case, your roof must be repaired or replaced. Or the roof is perfectly all right, but the gutters are clogged, and the water has nowhere else to go, so it drains into your home. Clogged gutters lead to a leaky roof, ultimately causing damage to your ceilings and walls. If that’s the case, cleaning and unclogging your gutters is essential.
- Water leaking from the room above – If a bathroom is above the room in question, the most likely cause is a leaky pipe. If the pipe was improperly installed, has worn out with age, has been punctured, or has burst due to freezing, your pipe must be repaired or replaced.
Safety precautions
In every home improvement project, safety is always a top priority.
If only a small amount of mold is present in the ceiling, you can safely remove it by yourself. Consider the following safety tips before doing any minor or cosmetic repairs to your ceiling:
- Move out furniture and remove décor or protect them with drop cloths or plastic sheets.
- Make sure that the work area is well-ventilated by opening windows, turning on fans, using air filters, etc.
- Protect your flooring with drop cloths.
- Make sure to wear safety gloves, goggles, and a dust mask to protect yourself from mold spores.
But in case there is severe water damage to your ceiling and the structural parts of your home, you should expect more extensive work that may also involve the replacement of damaged wood features.
- Move your furniture away from the work area quickly so that the necessary ceiling repairs can be done properly.
- Turn off the electricity and/or water supply.
- Remove décor and fixtures from the walls and drapes or curtains.
- Make sure that the work area is well-ventilated by opening windows, turning on fans, using air filters, etc.
- Protect your flooring with drop cloths.
- Wear protective gear like rubber gloves, goggles, and a dust mask.
Tools and materials needed for water-damaged ceiling repair
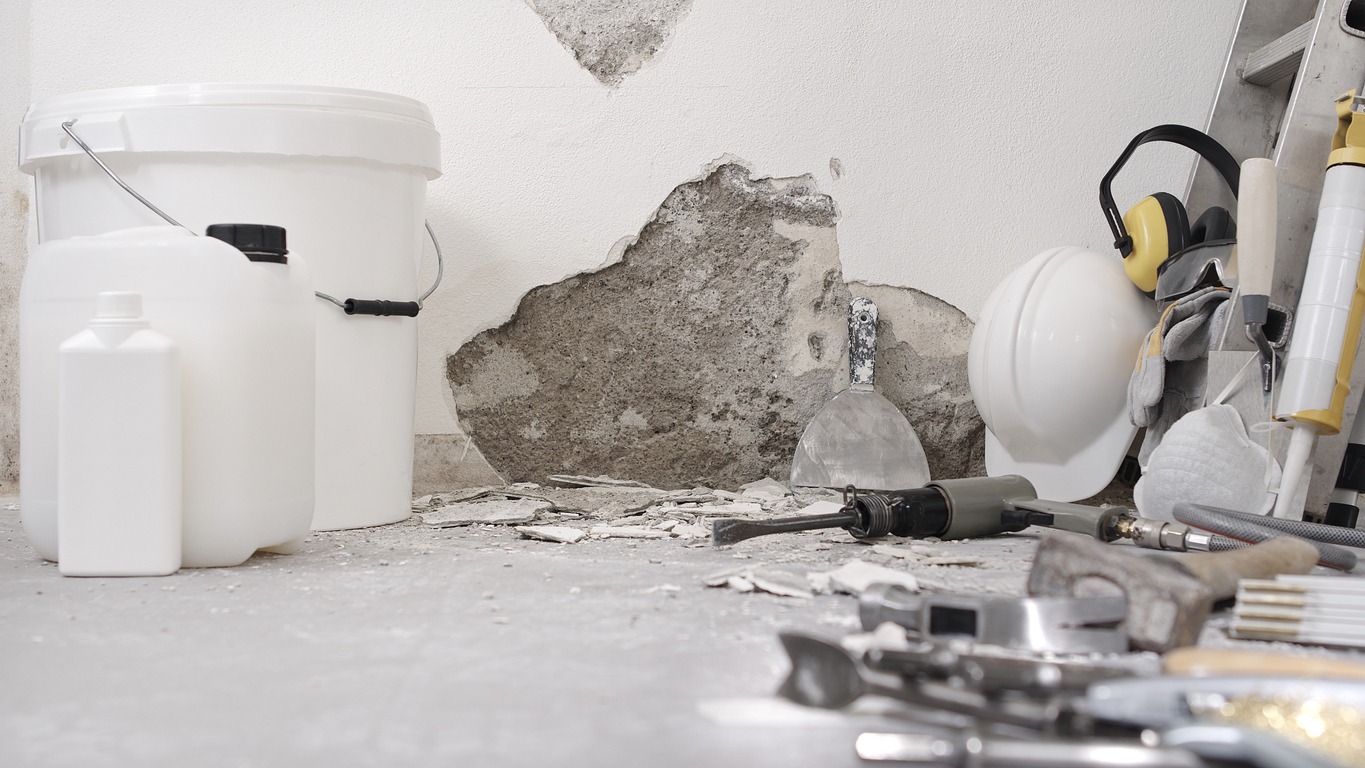
Here’s what you need to help you complete this project successfully:
- A sturdy ladder
- Screwdriver
- Utility knife
- Drywall saw
- Filler (such as joint compound)
- Drywall patches
- Drywall tape
- Sandpaper or other sanding tool
- Paint
- Primer
How to remove damaged materials
Once you have identified and addressed the water leak and issue, you should remove the damaged drywall and other materials.
Removing and replacing water-damaged drywall:
- Remove materials that have been damaged by water, such as discolored materials that contain mold or rot, as well as damaged drywall.
- Cut a hole out of the damaged drywall. As you’re removing the damaged area, be extra careful not to cut through any electrical lines.
- Use industrial drying fans or ordinary house fans to dry out the areas above and below the damage. Just make sure to get everything completely dry – just because it looks dry on the surface doesn’t mean it’s dry. Wait a couple of days and then check to see if the surfaces have completely dried or if there’s any water left.
- Remove the drywall’s insulation if needed. If the drywall was wet, likely the insulation was also wet.
- Before patching up the drywall, check for and address any mold issues.
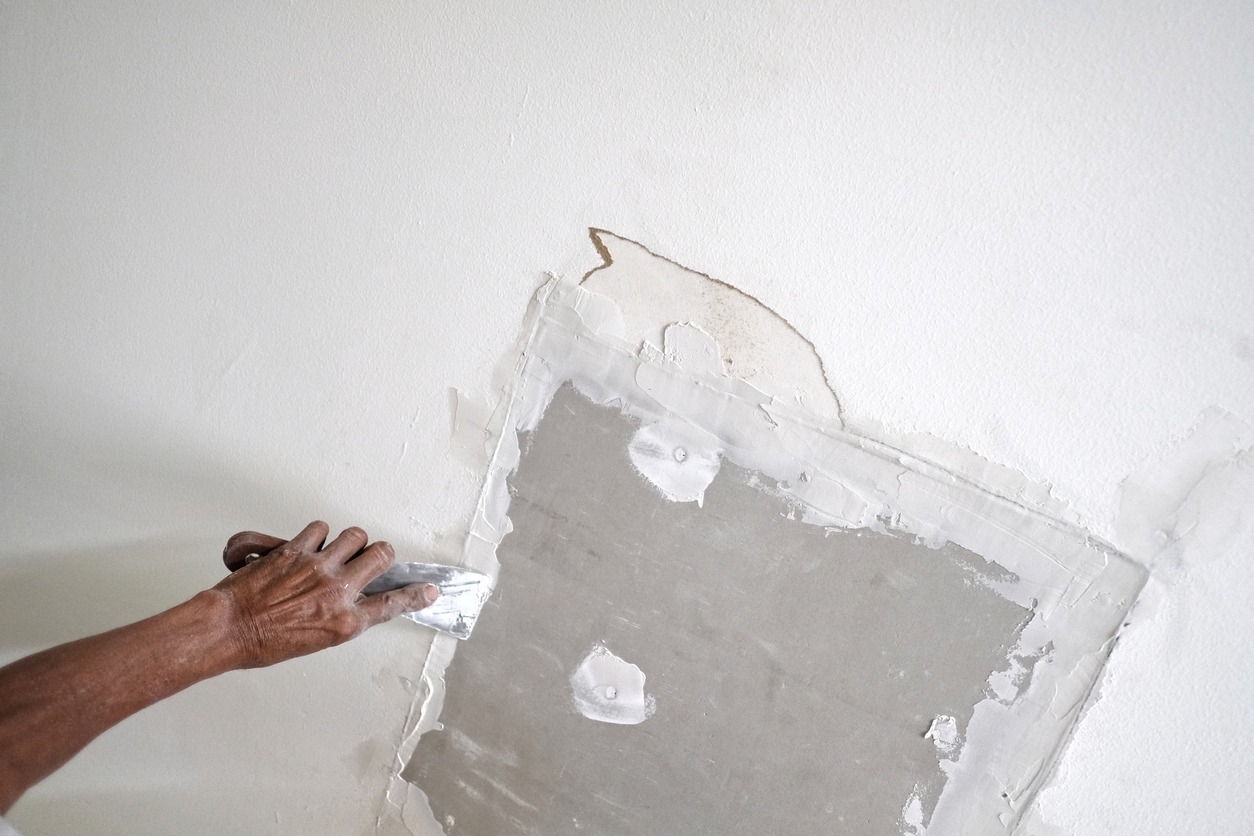
- Patch up the damaged drywall. Measure the size of the hole in the wall so you know how much to cut out a new piece of drywall. Secure the new drywall piece into the hole with drywall screws.
- Fill the seams with joint compound and leave it to dry. Once dried, sand the filled seams to blend the new drywall piece with the rest of the wall.
- Prime and paint the new area.
Repairing water-damaged ceiling
Once the ceiling has completely dried, make the necessary repairs.
- Apply new drywall adhesive on the ceiling joists.
- Place insulation above the new drywall sheet.
- Press the drywall sheet against the joist for around 10 seconds using a drywall lift.
- Make a light mark for the holes you need to cut for light fixtures and where the joists are located.
- Repeat steps 1 to 4 until the ceiling is covered.
- Drive nails or screws where you marked there are joists.
- Cut holes for lights or fixtures using a utility knife. Start with small holes and widen it as necessary.
- Reinstall lights or fixtures.
Ways to prevent future water damage
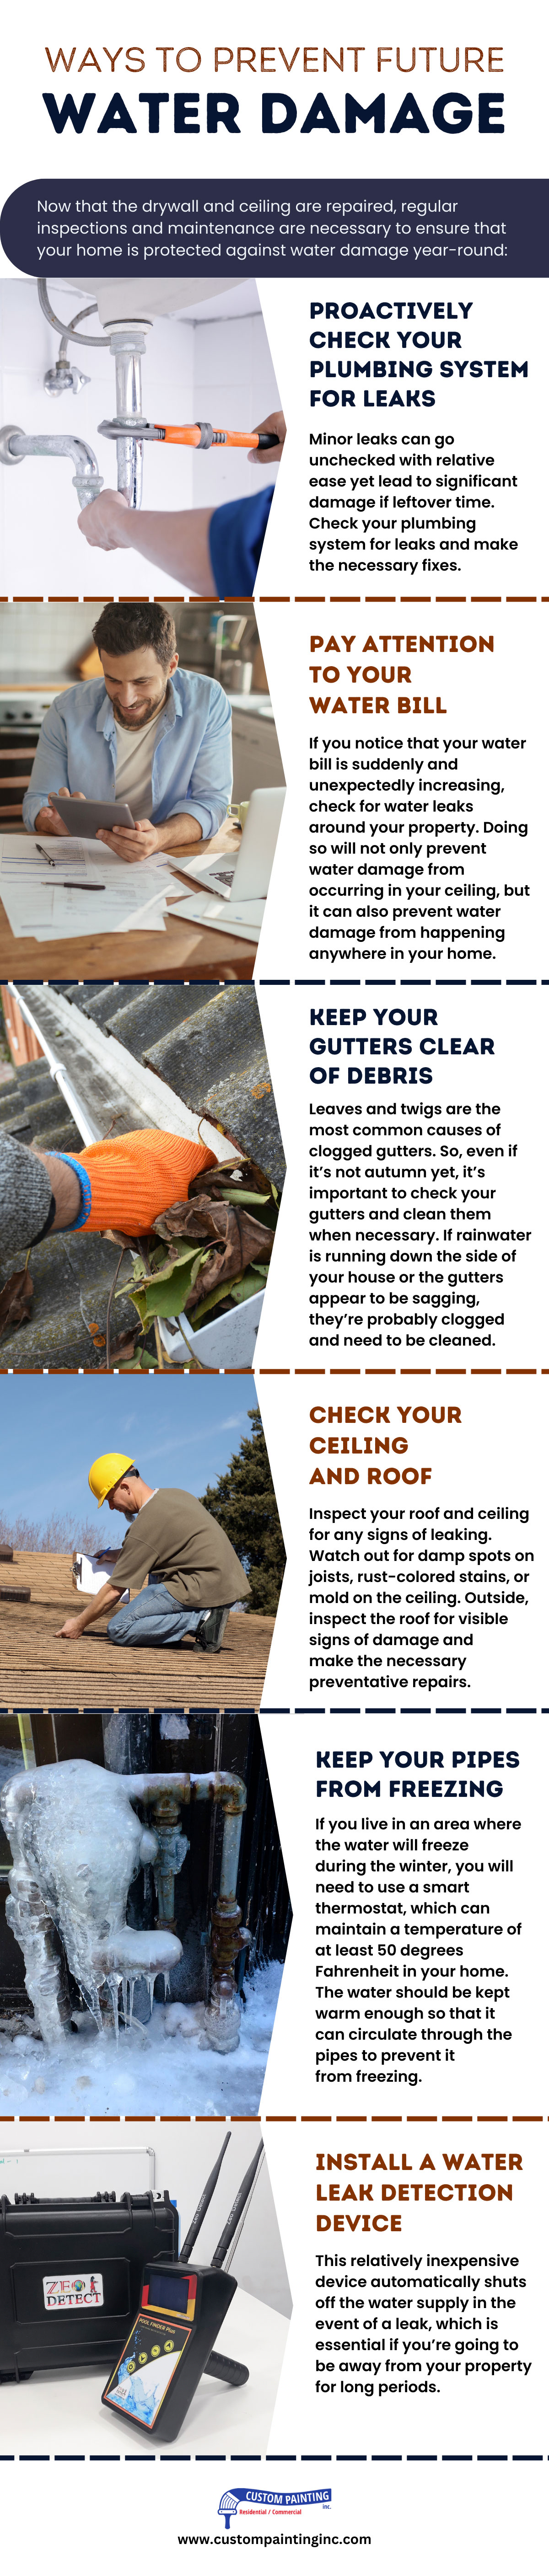
Now that the drywall and ceiling are repaired, regular inspections and maintenance are necessary to ensure that your home is protected against water damage year-round:
- Proactively check your plumbing system for leaks – Minor leaks can go unchecked with relative ease yet lead to significant damage if leftover time. Check your plumbing system for leaks and make the necessary fixes.
- Pay attention to your water bill – If you notice that your water bill is suddenly and unexpectedly increasing, check for water leaks around your property. Doing so will not only prevent water damage from occurring in your ceiling, but it can also prevent water damage from happening anywhere in your home.
- Keep your gutters clear of debris – Leaves and twigs are the most common causes of clogged gutters. So, even if it’s not autumn yet, it’s important to check your gutters and clean them when necessary. If rainwater is running down the side of your house or the gutters appear to be sagging, they’re probably clogged and need to be cleaned.
- Check your ceiling and roof – Inspect your roof and ceiling for any signs of leaking. Watch out for damp spots on joists, rust-colored stains, or mold on the ceiling. Outside, inspect the roof for visible signs of damage and make the necessary preventative repairs.
- Keep your pipes from freezing – If you live in an area where the water will freeze during the winter, you will need to use a smart thermostat, which can maintain a temperature of at least 50 degrees Fahrenheit in your home. The water should be kept warm enough so that it can circulate through the pipes to prevent it from freezing. If you’re going to be away from home for extended periods, turn off the water supply at the stopcock and drain the water system so that no water is left from the pipes.
- Install a water leak detection device – This relatively inexpensive device automatically shuts off the water supply in the event of a leak, which is essential if you’re going to be away from your property for long periods.
Hire a professional
Unless you have first-hand experience with water damage, trying to repair it by yourself is not usually recommended. Keep in mind addressing the symptoms of a problem is not enough. You must also be able to fix the root cause.
It’s best to bring in a qualified contractor to repair or replace damaged drywall and ceiling. It’s important to have someone skilled and experienced to make sure that the newly installed ceiling and drywall are structurally secure and have proper insulation.
Is water damage covered by your homeowner’s insurance?
If you have detected signs of water damage in your ceiling or suspected that there’s hidden damage, you may want to know whether it is covered by your homeowners’ insurance. The good news is that most homeowners’ insurance policies will cover water damage as long as it is not caused by flooding, faulty repairs, or poor maintenance. If you want to know and understand what is and what is not covered by your insurance, get in touch with your insurance company with your questions or concerns.
Conclusion
Water damage to your ceiling is something you should not ignore – it can get serious if left unchecked. Look out for signs of water damage and determine the extent of the damage. It’s better to locate and address the source of leaks before making the necessary repairs so that water damage won’t happen again to your ceiling, drywall, or any other part of your home or commercial building.
If you are concerned about repairing water ceiling damage, call the experts from Custom Painting, Inc. We have the skills, experience, and tools to effectively address water damage to your ceiling, drywall, or any other part of your property. When you see signs of water damage, call Custom Painting, Inc. at 925-294-8062 or by filling out our online form to minimize further damage and costs!